https://github.com/zients/django-react-forum
https://github.com/zients/django-react-forum
Last synced: 2 months ago
JSON representation
- Host: GitHub
- URL: https://github.com/zients/django-react-forum
- Owner: zients
- Created: 2019-10-04T13:44:37.000Z (over 6 years ago)
- Default Branch: master
- Last Pushed: 2022-12-08T07:03:31.000Z (over 3 years ago)
- Last Synced: 2026-03-23T18:30:56.678Z (3 months ago)
- Language: JavaScript
- Size: 18.6 MB
- Stars: 0
- Watchers: 1
- Forks: 0
- Open Issues: 5
-
Metadata Files:
- Readme: README.md
Awesome Lists containing this project
README
# Catalog/目錄
## English
[GettingStarted](#GettingStarted)
[NewArticle](#NewArticle)
[Comment](#Comment)
[Login](#Login)
[Registration](#Registration)
## 中文
[啟動](#啟動)
[簡介](#簡介)
[新話題](#新話題)
[留言](#留言)
[登入](#登入)
[註冊](#註冊)
# GettingStarted
## React
Hello, you can start this project by installing react and others modules with front-end by npm.
```
$ npm install
```
Then, we need to run the front-end server.
```
$ npm run start
```
## Django
We need to enter the virtual environment to run django server.
```
$ virtualenv env
```
```
$ cd env
$ Scripts/activate (Windows)
$ source bin/activate (MacOS/Linux)
```
Run server.
```
$ py manage.py runserver
```
---
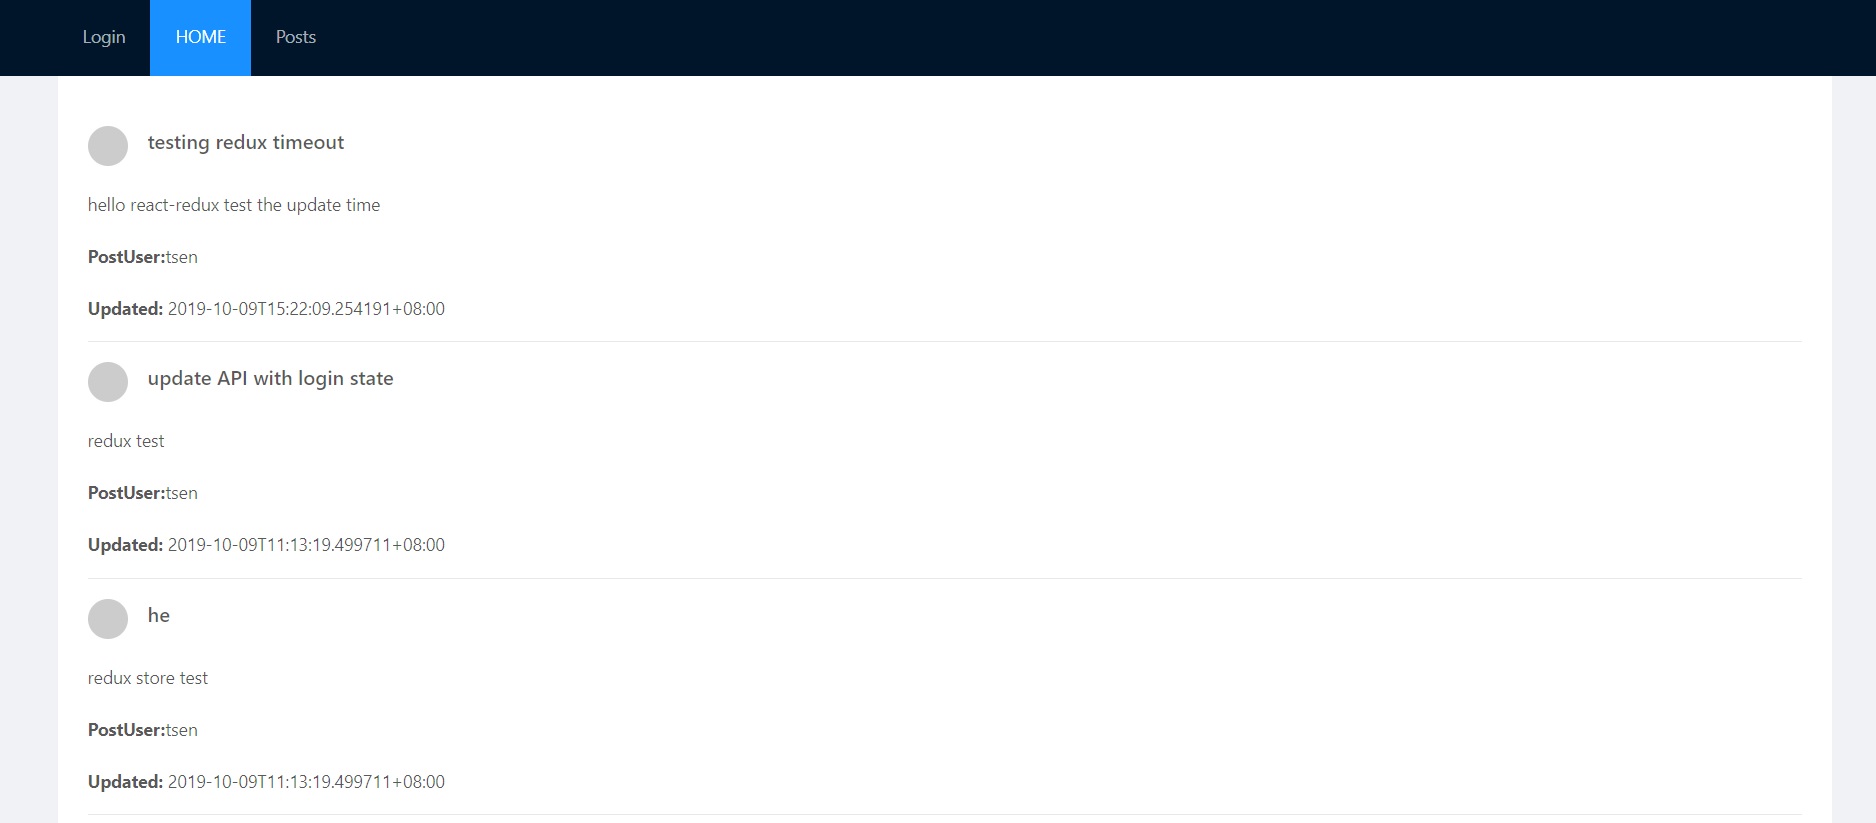
## Introduction
This is a forum where users can post articles.
Users can read and comment which they are interested in.
# NewArticle
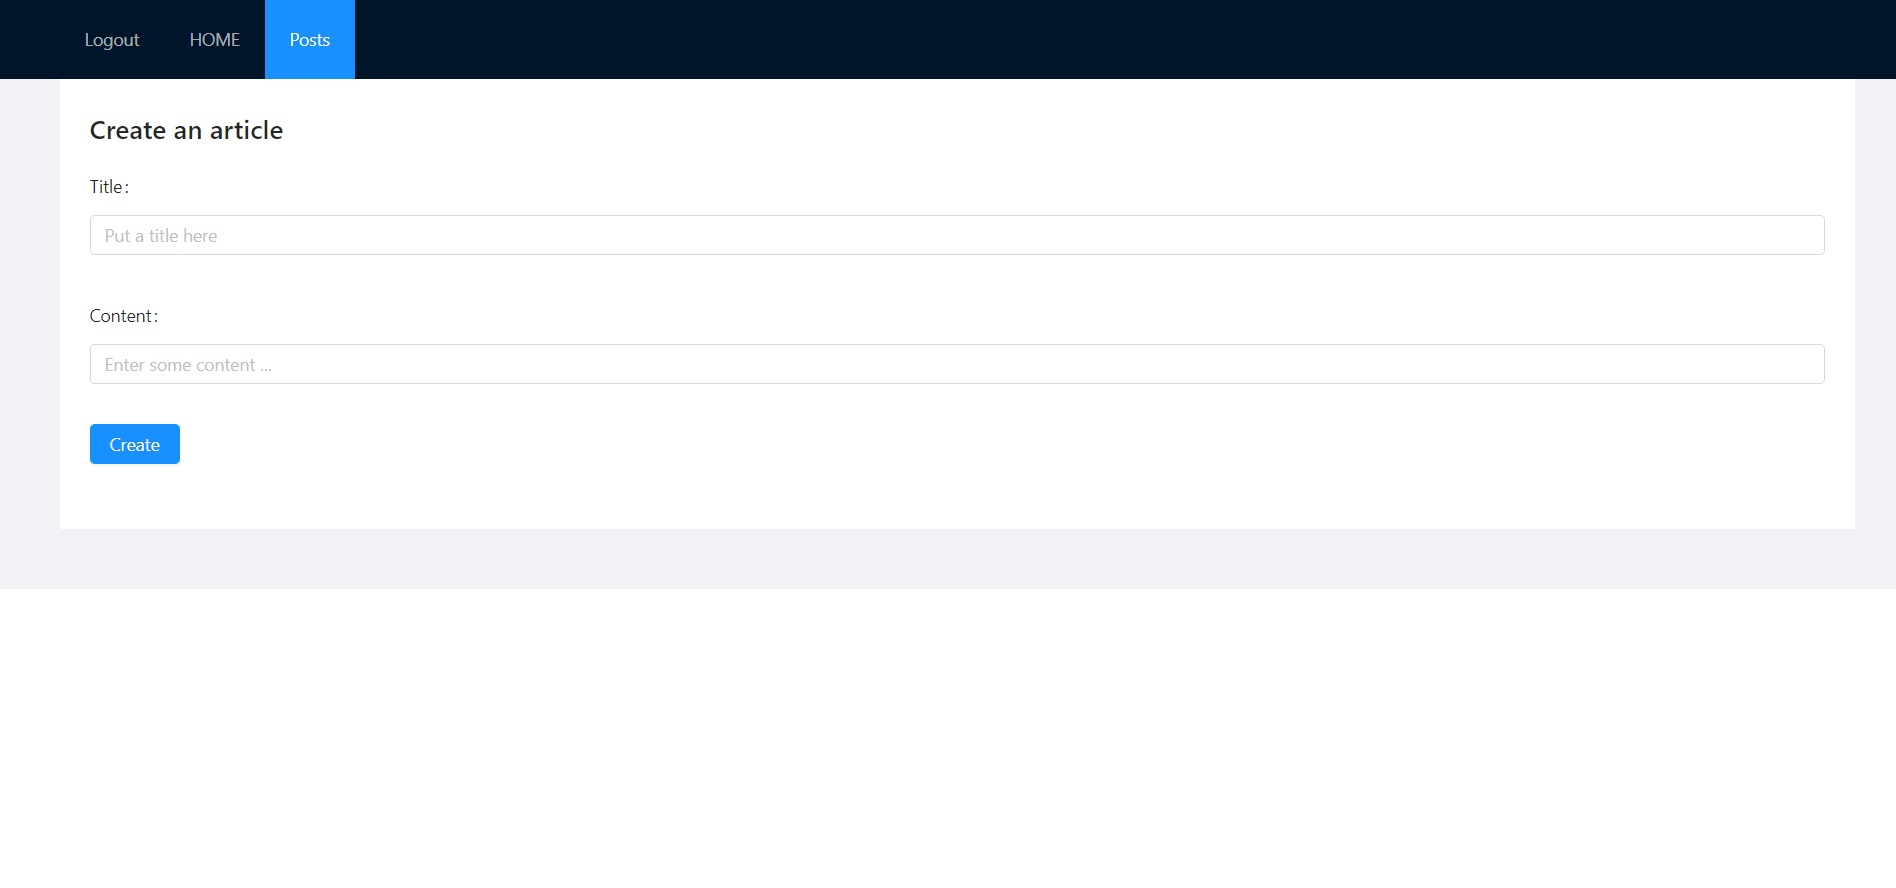
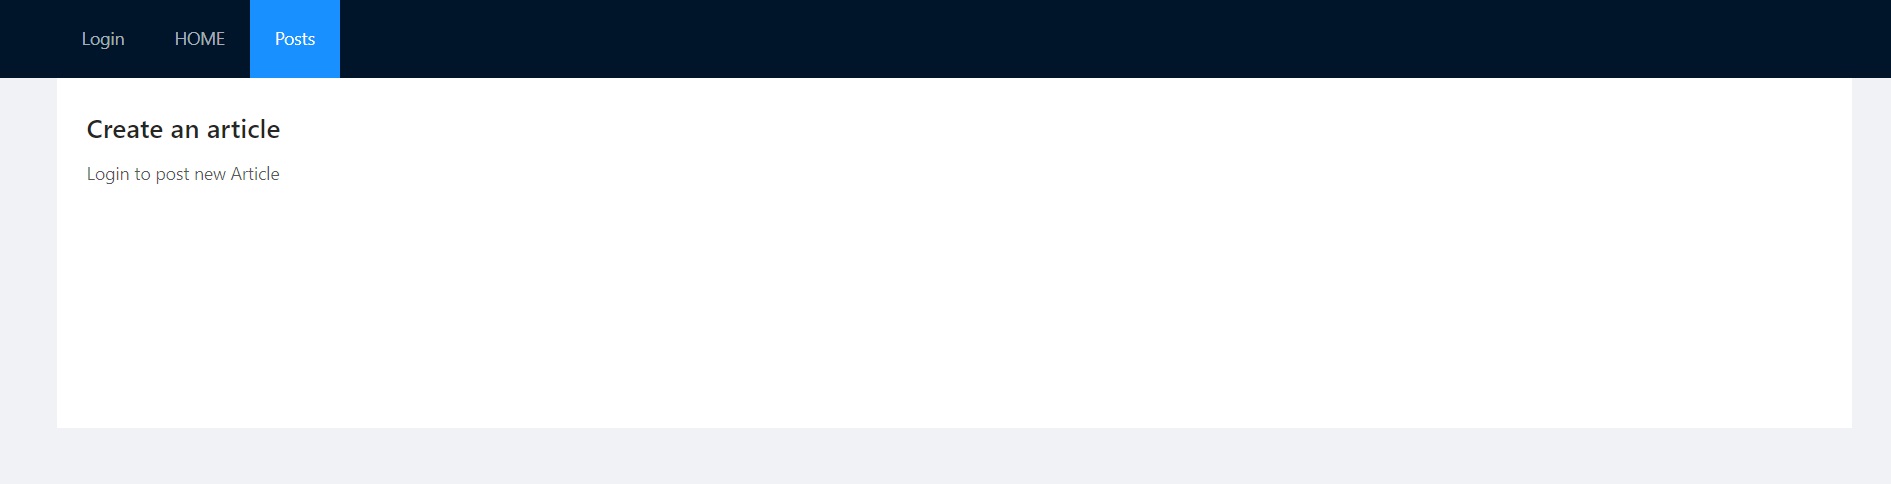
Users can post their article after they login.
If you aren't login, the feature will lock.
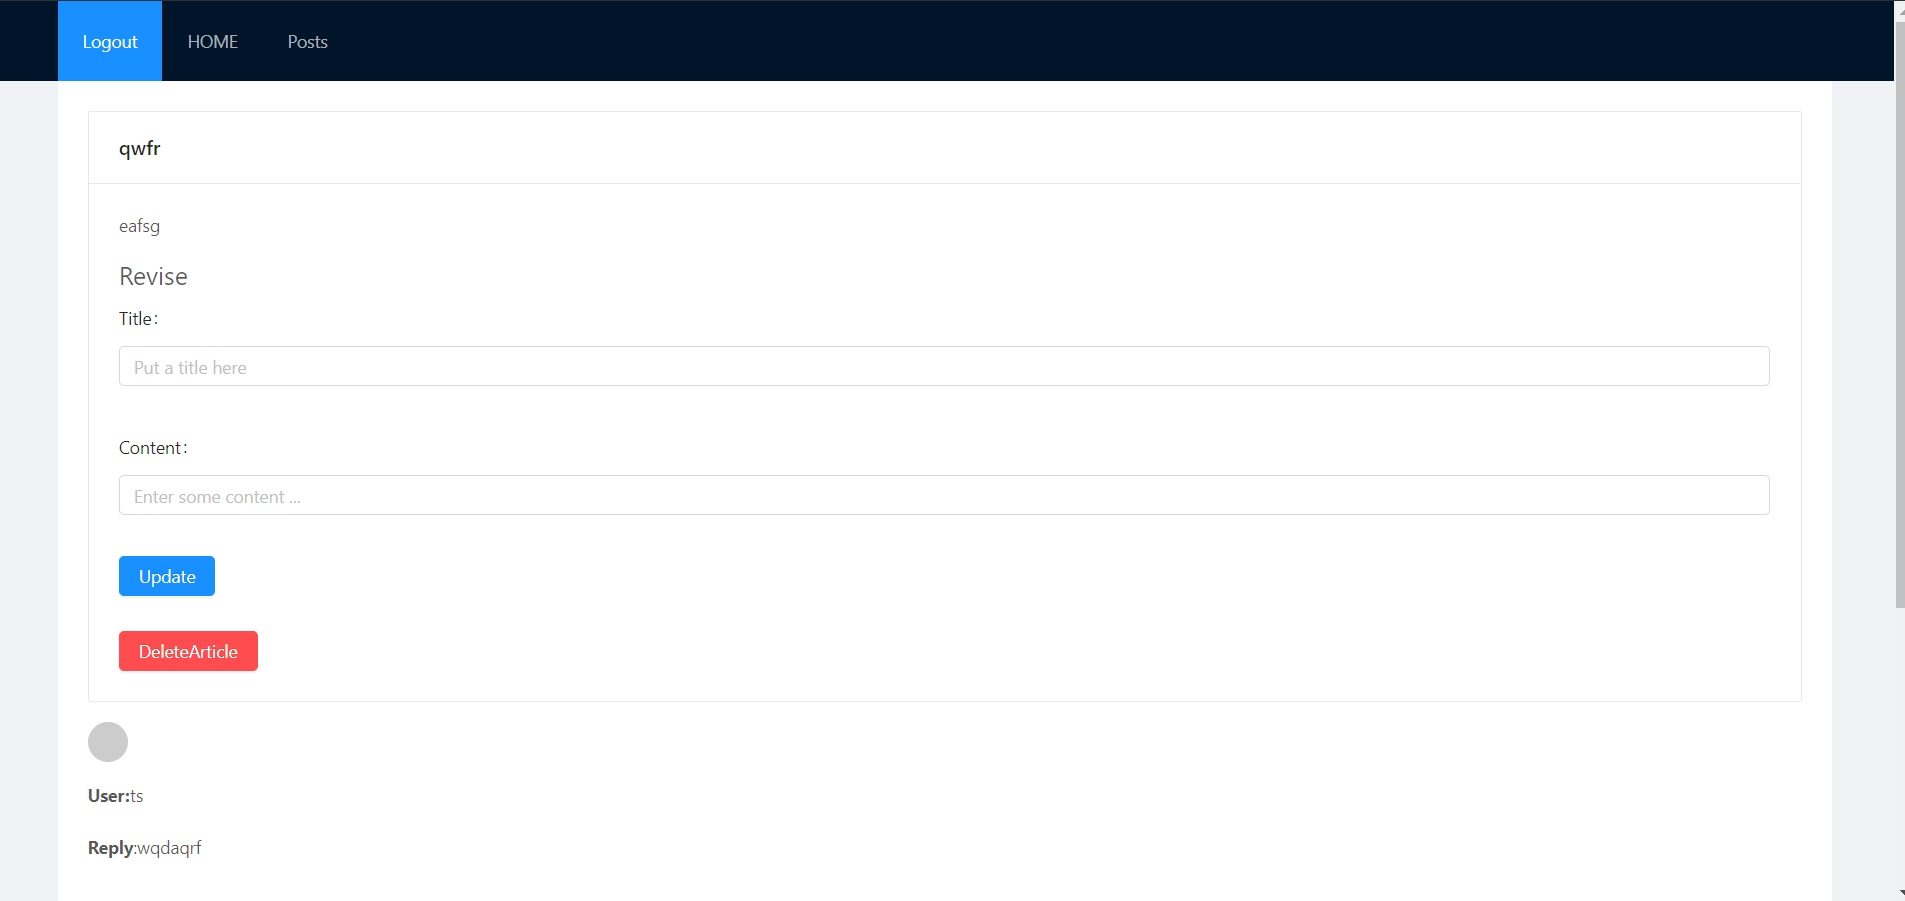
If you are the article creator, you can delete and update the article.
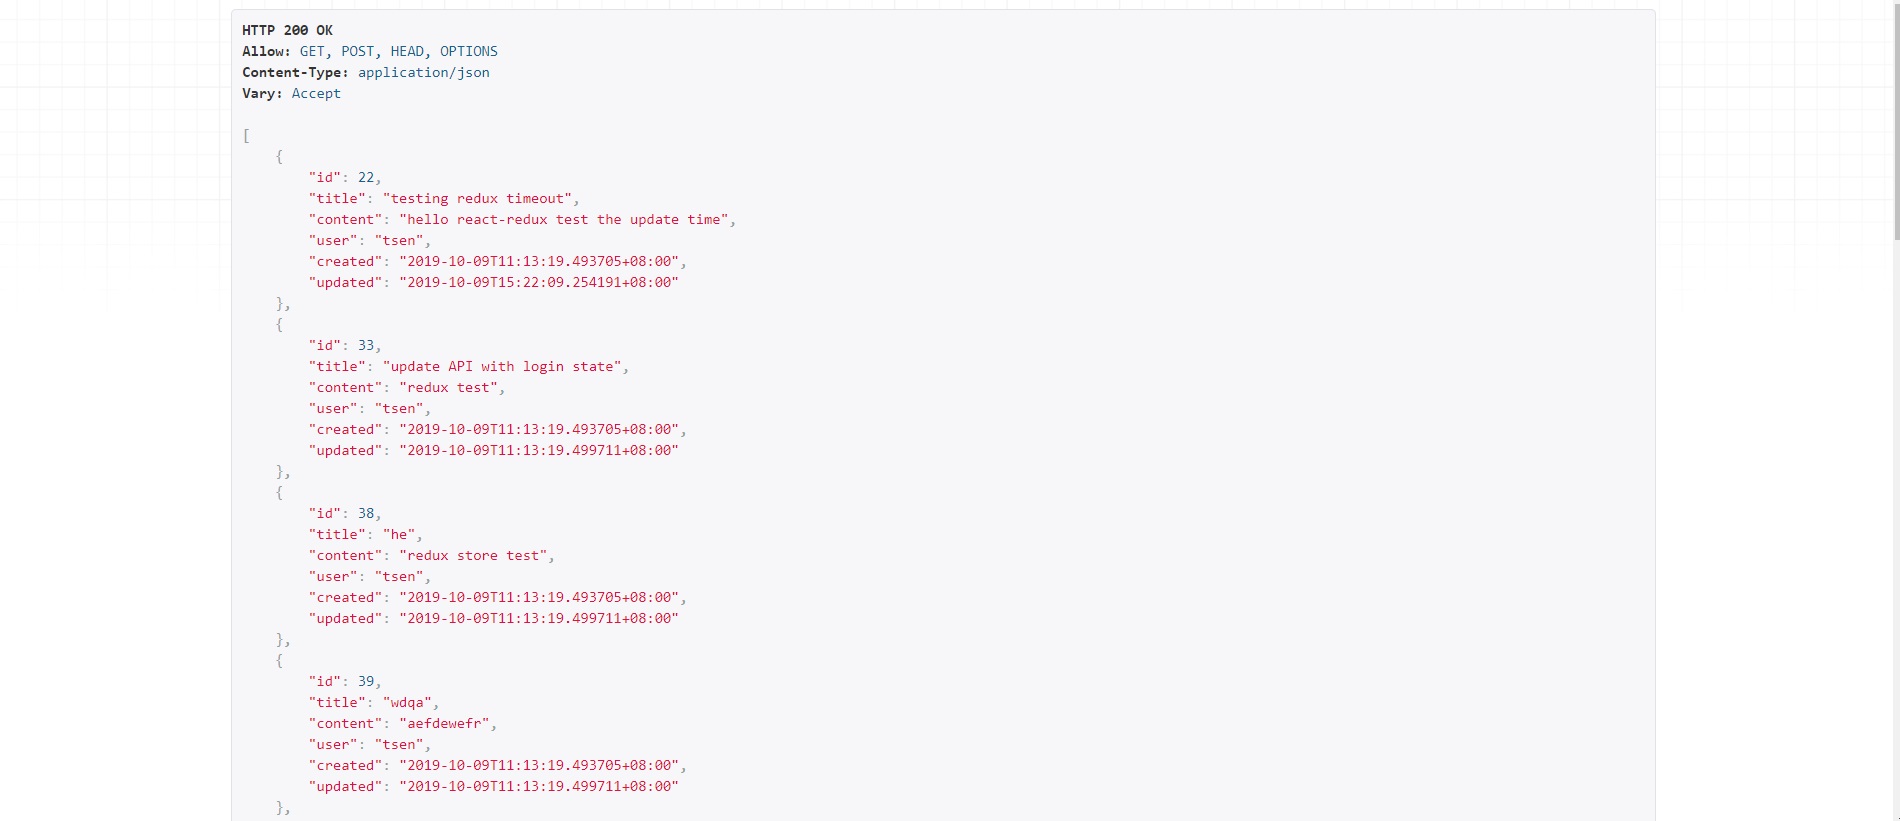
Hint: Data will post, then Django Model will process that, save to SQLite3, design api with rest framework finally.
```
Article API setting:
class ArticleSerializer(serializers.ModelSerializer):
class Meta:
model = Article
fields = ('id', 'title', 'content', 'user', 'created', 'updated')
```
# Comment
Users can enter the articles and comment.
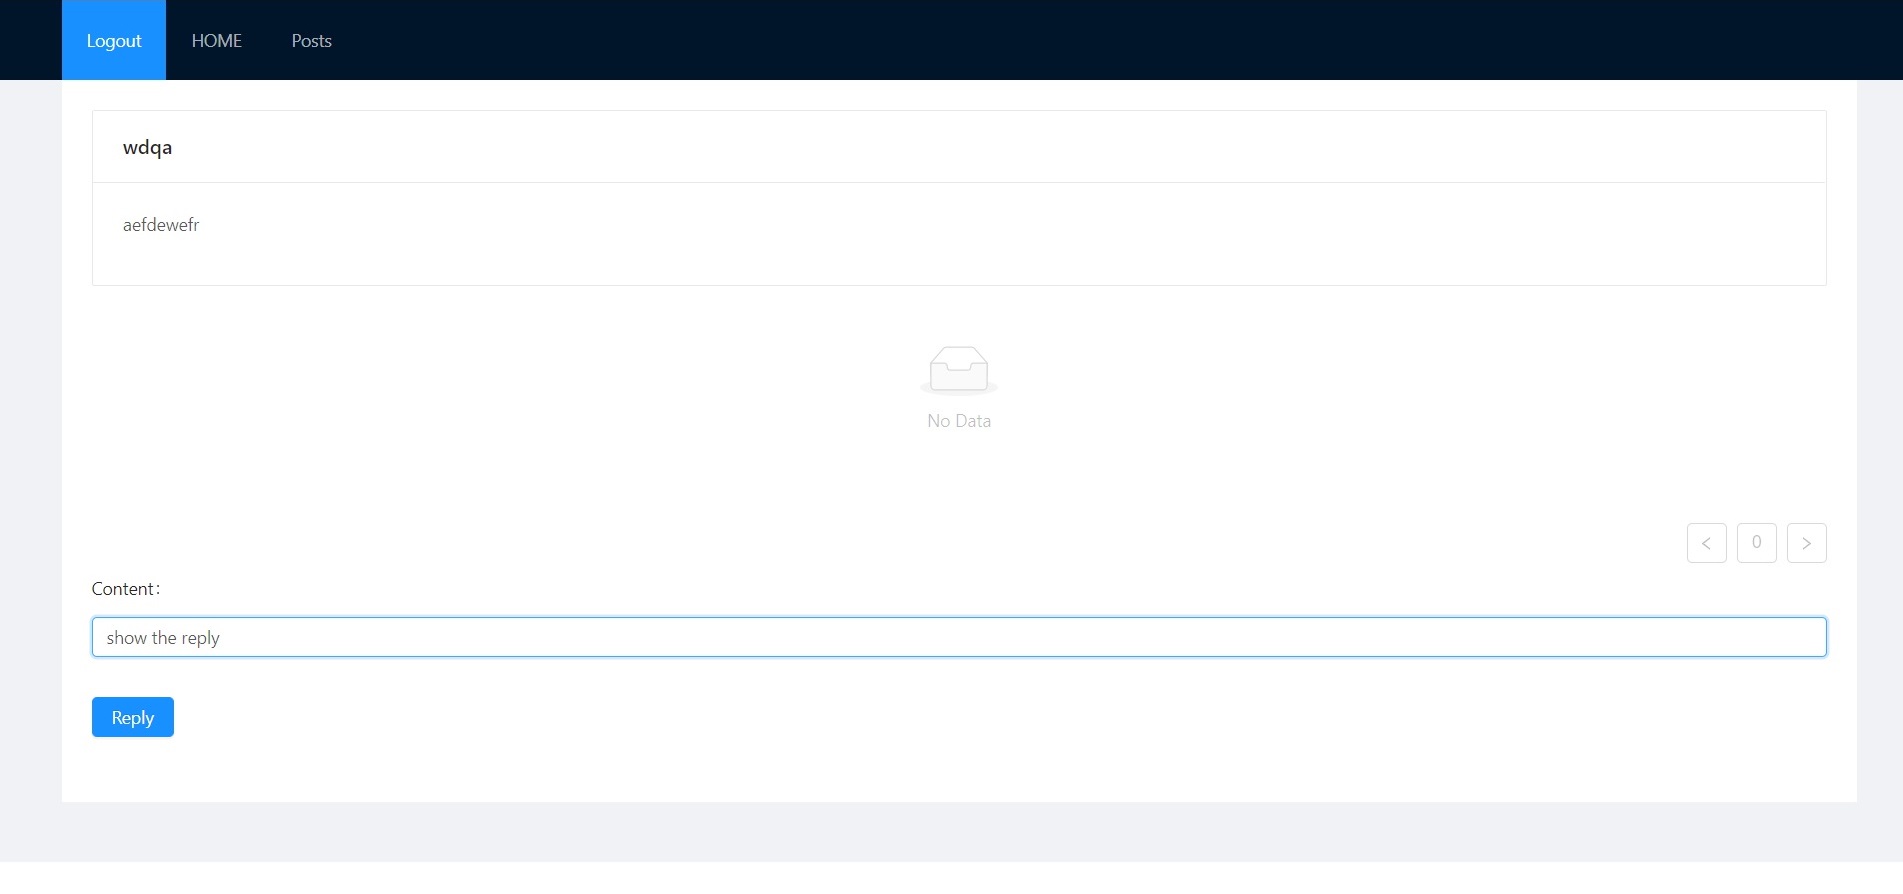
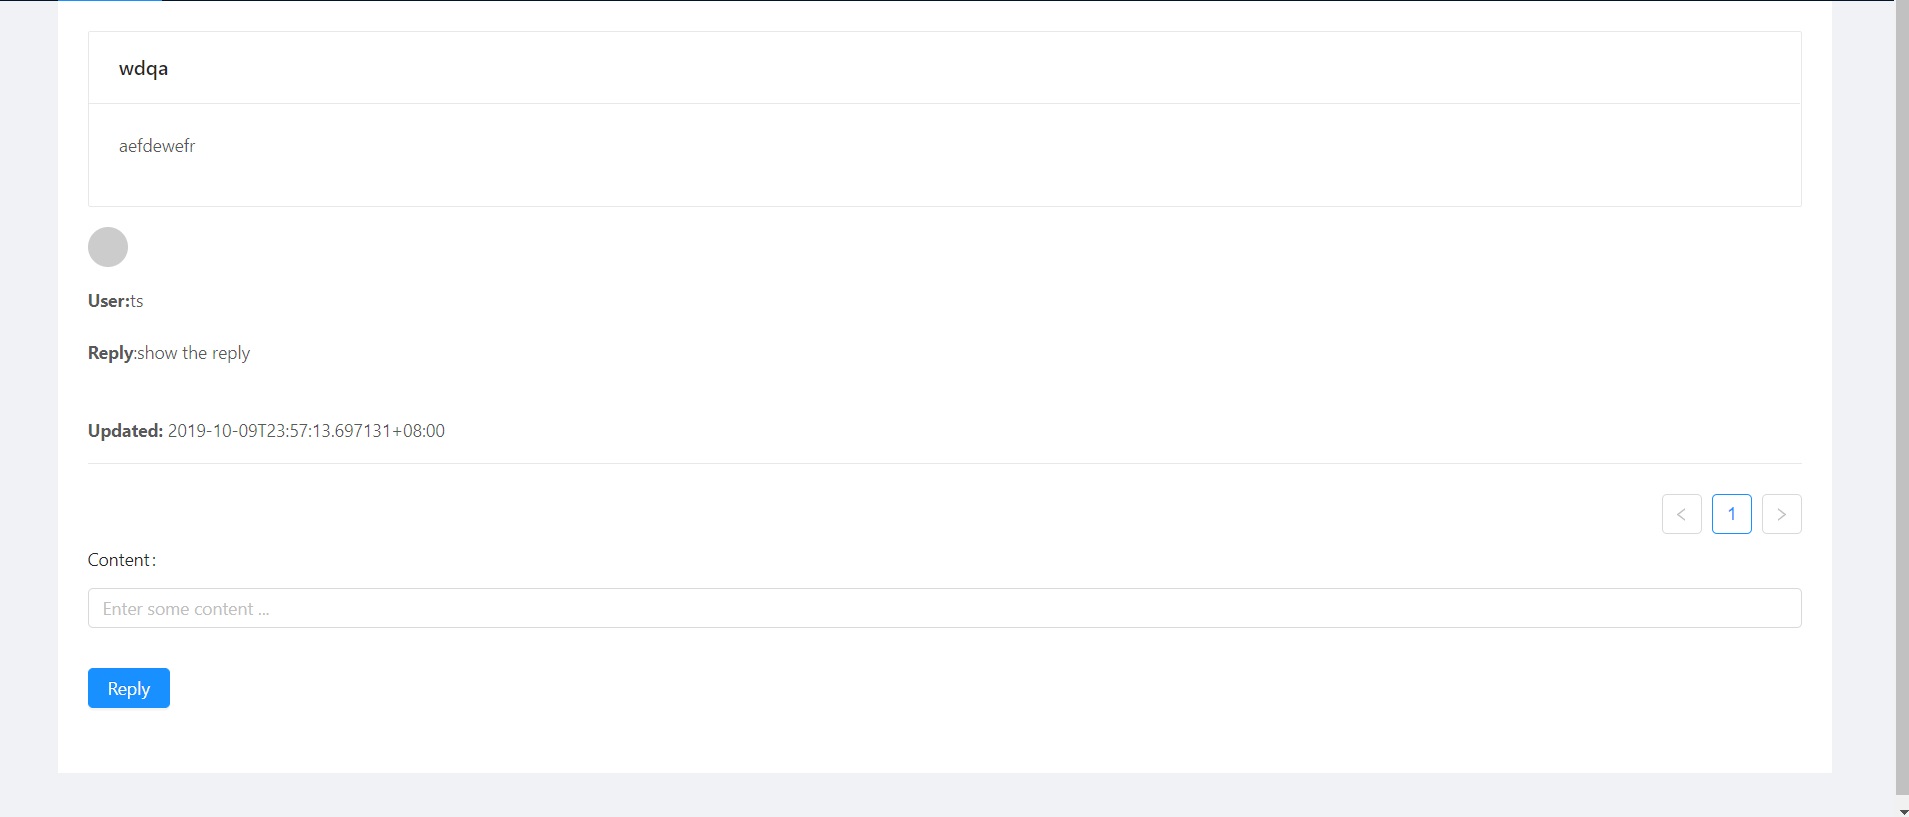
Comments will have foreign key to connect with the article which they leave messages.
You can't comment until you login.

```
API filter:
class CommentFilter(django_filters.FilterSet):
class Meta:
model = Comment
fields = ['article', 'user']
```
```
API setting:
class CommentSerializer(serializers.ModelSerializer):
class Meta:
model = Comment
fields = ('id', 'article', 'content', 'user', 'created', 'updated')
```
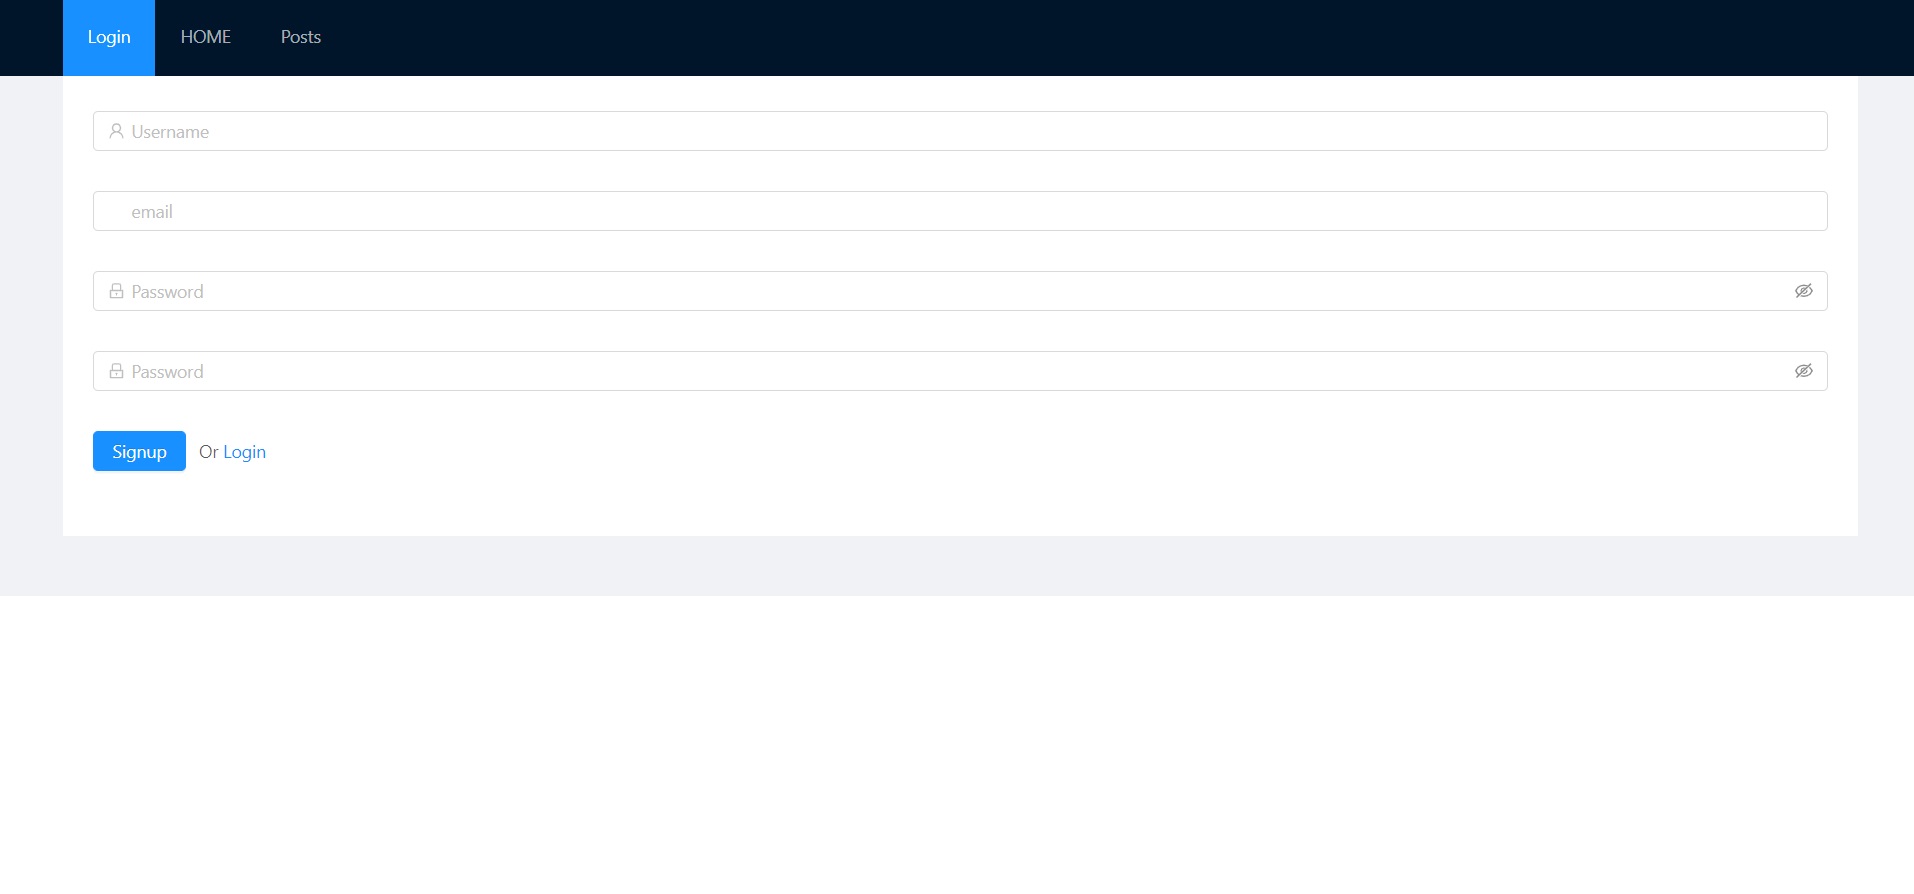
# Login
Login page:
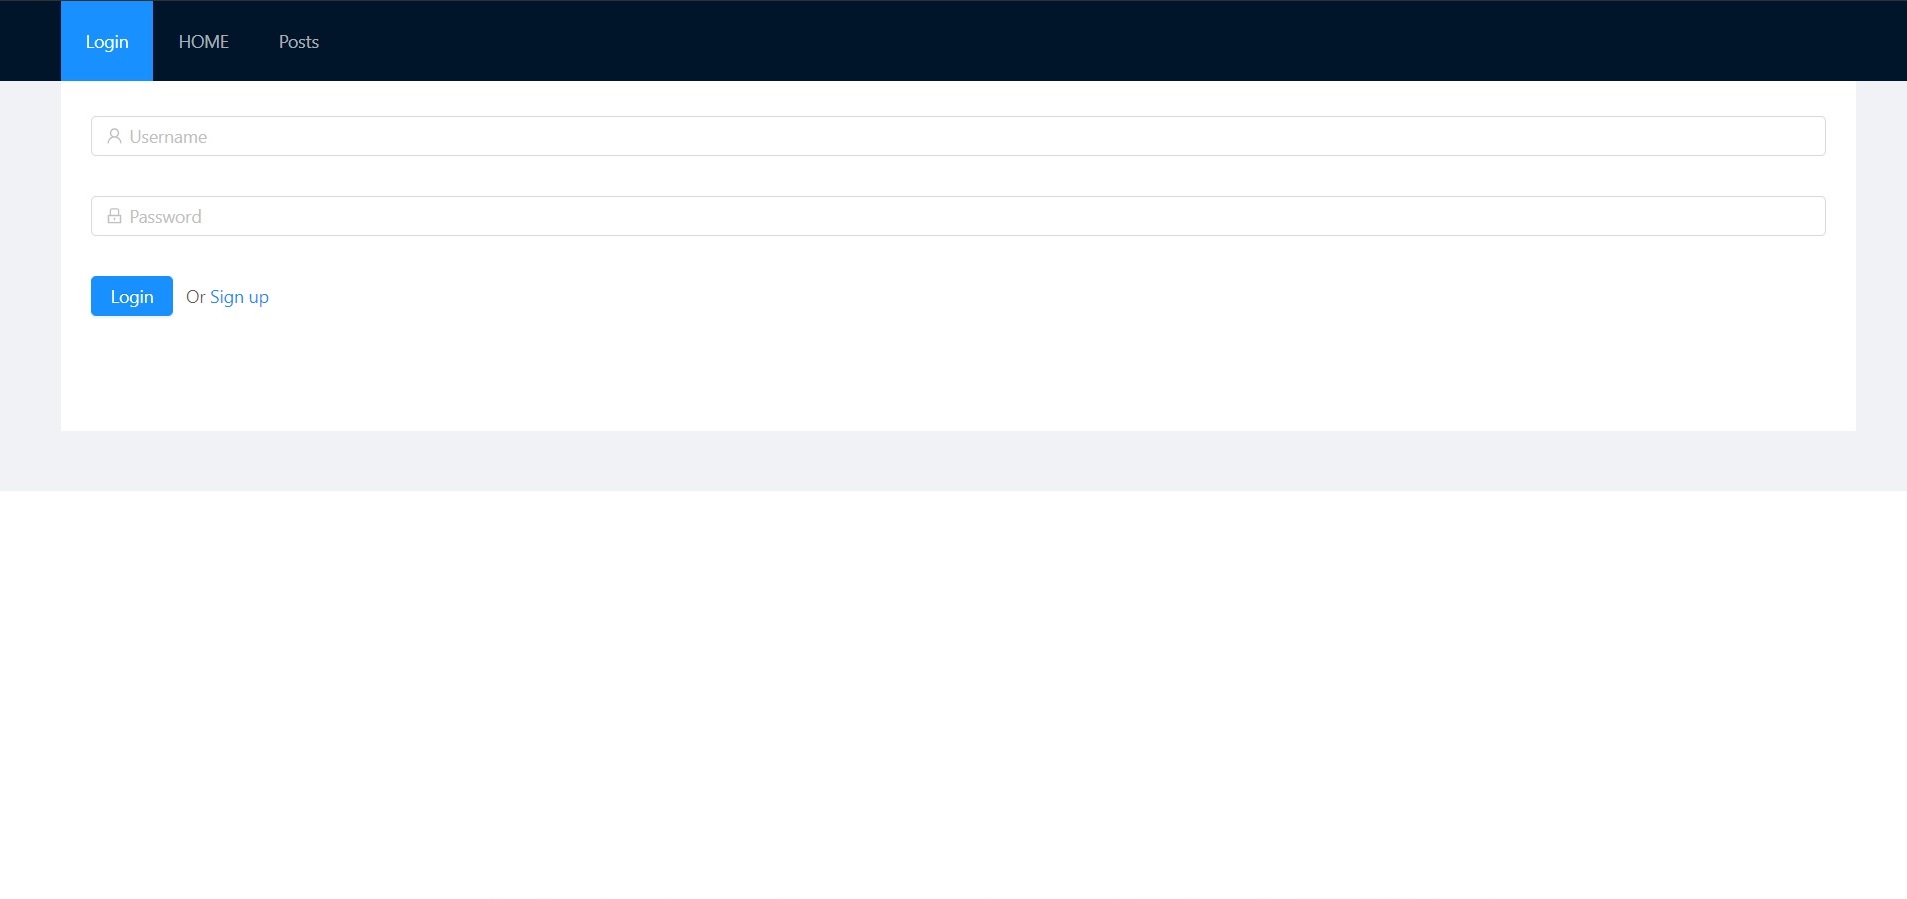
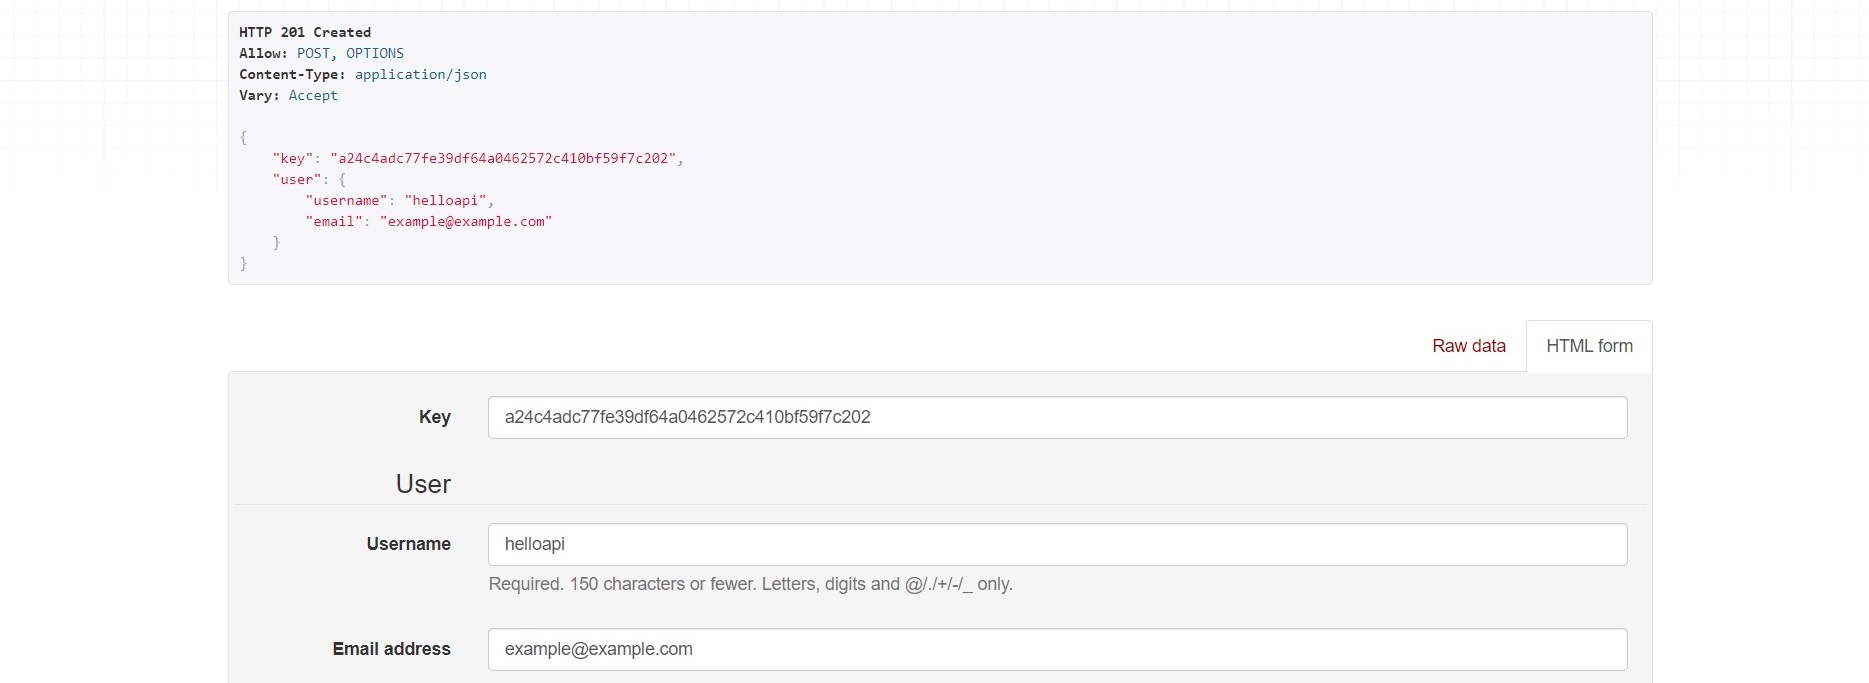
When it posts the account info, back-end will receive the requests and then send token and username to front-end.
React gets the response then dispatch information.
Rudex manages the statement.
Rest-auth API settings:
```
from rest_framework.authtoken.models import Token
from django.contrib.auth.models import User
class UserSerializer(serializers.ModelSerializer):
class Meta:
model = User
fields = ('username', 'email')
class TokenSerializer(serializers.ModelSerializer):
user = UserSerializer()
class Meta:
model = Token
fields = ('key', 'user')
```
Redux reducer settings:
```
utility:updateObject(state,updatedProperty)
const initialState = {
token: null,
userid: null,
error: null,
loading: false
};
const authStart = (state, action) => {
return updateObject(state, {
error: null,
loading: true
});
};
const authSuccess = (state, action) => {
return updateObject(state, {
token: action.token,
userid: action.userid,
error: null,
loading: false
});
};
const authFail = (state, action) => {
return updateObject(state, {
error: action.error,
loading: false
});
};
const authLogout = (state, action) => {
return updateObject(state, {
token: null,
userid: null
});
};
```
Login actions function settings:
```
function authStart()
function authSuccess(token, userid)
function authFail(error)
function logout()
function checkAuthTimeout(expirationTime)
function authLogin (username, password)
function authCheckState ()
You can know the detail from code.
```
Back-end API login.

# Registration
Registration page:
The post data will insert into SQLite3 by Django Model.
Registration has the addition action below.
```
function authSignup (username, email, password1, password2)
You can know the detail from code.
```
# 啟動
## 前端
React/Redux 開發。
請先安裝 Node 與 Npm。
並輸入下面的指令安裝 modules。
```
$ npm install
```
啟動伺服器
```
$ npm start
```
預設 Port 為 3000,位於 localhost。
## 後端
Python Django 開發。
須先進入虛擬環境。
```
$ cd env
$ Scripts/activate
```
成功進入虛擬環境後進入 src 目錄,並安裝所需 modules。
```
$ pip install -r requirements.txt
```
安裝完成後,啟動伺服器 Server。
```
$ py manage.py runserver
```
# 簡介
這是一個簡易的論壇,使用者可以發佈談話主題,其他用戶看到感興趣的主題,可以點進去並留言,與其他用戶進行互動。
# 新話題
使用者登入後可以在 Posts 的位置發佈主題,或至主題列最下方發佈。
需要進行登入才能發文,不然功能會被鎖定。
若主題發佈者是使用者本人,則可以進行刪除貼人以及改變主題內容的動作。
說明:發佈的貼文會 Post 到後端,傳至 Django Model 處理,並存放置資料庫,再透過 API,由前端串接,並在頁面上顯示內容。
```
Article API setting:
class ArticleSerializer(serializers.ModelSerializer):
class Meta:
model = Article
fields = ('id', 'title', 'content', 'user', 'created', 'updated')
```
# 留言
使用者進入別人開設的主題後,可以在裡面留言,與其他用戶互動。
同樣地,流程與發文相同,留言會 Post 到後端,經由 Django Model 處理,存至資料庫 ,並在頁面上顯示留言,在這裡留言的顯示會根據 Foreign Key 的索引經由 API filter 顯示。
且未登入一樣無法使用留言系統。
```
API filter:
class CommentFilter(django_filters.FilterSet):
class Meta:
model = Comment
fields = ['article', 'user']
```
```
API setting:
class CommentSerializer(serializers.ModelSerializer):
class Meta:
model = Comment
fields = ('id', 'article', 'content', 'user', 'created', 'updated')
```
# 登入
登入頁面。
如果沒有帳號請選擇註冊。
當登入完成後,會將登入資訊 POST 到後端,後端會回應並傳出登入的帳號以及 Token,隨後前端接收並 Dispatch, Redux 來進行狀態管理,確認是否為登入成功的狀態,而 Login 會變更為 Logout。
在這邊使用 rest framework 的 auth 部分,API 設定為:
```
from rest_framework.authtoken.models import Token
from django.contrib.auth.models import User
class UserSerializer(serializers.ModelSerializer):
class Meta:
model = User
fields = ('username', 'email')
class TokenSerializer(serializers.ModelSerializer):
user = UserSerializer()
class Meta:
model = Token
fields = ('key', 'user')
```
Redux 的 reducer 主要設定為:
```
utility:updateObject(state,updatedProperty)
const initialState = {
token: null,
userid: null,
error: null,
loading: false
};
const authStart = (state, action) => {
return updateObject(state, {
error: null,
loading: true
});
};
const authSuccess = (state, action) => {
return updateObject(state, {
token: action.token,
userid: action.userid,
error: null,
loading: false
});
};
const authFail = (state, action) => {
return updateObject(state, {
error: action.error,
loading: false
});
};
const authLogout = (state, action) => {
return updateObject(state, {
token: null,
userid: null
});
};
```
而 login actions 簡單地分為:
```
function authStart()
function authSuccess(token, userid)
function authFail(error)
function logout()
function checkAuthTimeout(expirationTime)
function authLogin (username, password)
function authCheckState ()
You can know the detail from code.
```
後端 API 登入後的操作。
# 註冊
註冊頁面。
輸入以下資訊即註冊完成。
註冊完成後跟登入一樣,但是後端會先把資訊傳入 Django Model,由 Model 處理並放置於資料庫,後面與登入流程大同小異。
action 部分這邊多使用了:
```
function authSignup (username, email, password1, password2)
You can know the detail from code.
```