https://github.com/ziolko/eink-calendar-display
E-ink meeting room schedule display
https://github.com/ziolko/eink-calendar-display
eink inkplate inkplate-6 meetingroom platformio
Last synced: 12 months ago
JSON representation
E-ink meeting room schedule display
- Host: GitHub
- URL: https://github.com/ziolko/eink-calendar-display
- Owner: ziolko
- License: gpl-3.0
- Created: 2024-08-12T13:04:15.000Z (almost 2 years ago)
- Default Branch: main
- Last Pushed: 2024-09-26T11:57:16.000Z (almost 2 years ago)
- Last Synced: 2025-03-25T23:23:34.444Z (over 1 year ago)
- Topics: eink, inkplate, inkplate-6, meetingroom, platformio
- Language: C
- Homepage: https://roombelt.com
- Size: 396 KB
- Stars: 8
- Watchers: 1
- Forks: 0
- Open Issues: 0
-
Metadata Files:
- Readme: README.md
- License: LICENSE
Awesome Lists containing this project
README
# E-ink meeting room schedule display


This repository contains instructions for creating a wireless e-ink device displaying schedule for a selected meeting room. Thi includes the firmware source code, models for 3D printing the case and a step-by-step guide.
After office hours the device can be turned into a photo frame featuring photos saved on a micro SD card. This makes it ideal e.g. for home office environment.

The device is based on the [Soldered Inkplate 6](https://soldered.com/product/soldered-inkplate-6-6-e-paper-board/) board that's available for ~110€. The earlier versions of Inkplate 6 (from e-radionica) are not supported.
The product uses [Roombelt](https://roombelt.com) as a backend. This is a paid product, but for private use (e.g. home office) you can request a free license from [mateusz@roombelt.com](mailto:mateusz@roombelt.com). See pricing for commercial users [here](https://roombelt.com/#pricing).
## Prerequisites
- Soldered Inkplate 6 - [available here](https://soldered.com/product/soldered-inkplate-6-6-e-paper-board/).
- 3.7V Li-ion battery with standard JST-PH-2mm connector and at least 3000mAh - [you can buy some from Soldered, too](https://soldered.com/categories/power-sources-batteries/batteries/lithium-batteries/).
- 3D printer.
- Four M2*10 screws.
- microSD card.
## Installing firmware on the Inkplate 6
The firmware is developed with [PlatformIO](https://platformio.org/). To install firmware on your device:
1. Install PlatformIO for Visual Studio code as [documented here](https://platformio.org/install/ide?install=vscode).
2. Clone the repository locally and open it in Visual Studio Code.
3. Connect Inkplate 6 to the computer with a USB cable.
4. Click the "Upload" button to install the firmware. 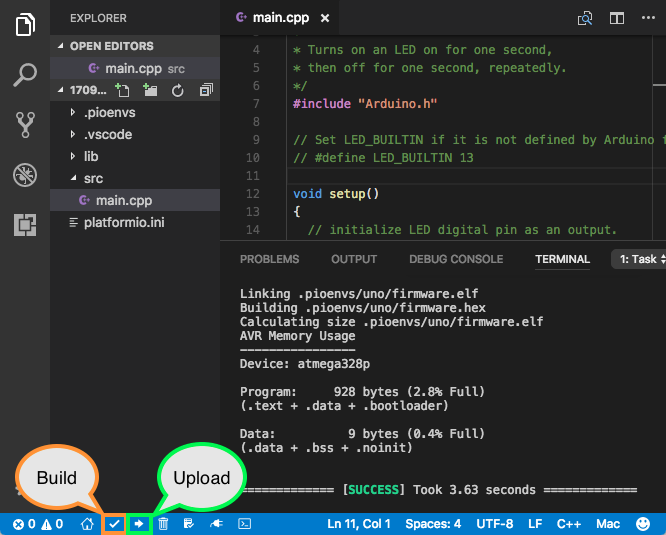
## Configuring WiFi settings
WiFi configuration is read from the `config.json` file on the micro SD card.
The card has to be formatted using the standard FAT file system.
```json
{
"ssid": "WiFi network name",
"password": "Wifi network password"
}
```
## Printing and assembling the case
The case is made of two parts that are assembled using four M2*10 screws:
- [Front](models/front.stl).
- [Back cover](models/cover.stl).
Print the parts in the provided orientation using any material with the following print settings:
- Supports: Yes
- Resolution: 0.2
- Infill: 20%
Once you have everything in place follow the instruction below:
1. Attach the battery to the back cover using a double sided tape.
2. Put the board into the front cover.
3. Connect the battery to the board.
4. Ensure that the board works and turn of the power LED using the switch on the board.
5. Put the back cover in place.
6. Use the screws to secure the back cover.
## License
The firware and instructions are shared under the GNU GPLv3 license. Models for 3D printer are available under CC BY-SA 4.0 license.