https://github.com/zoho/salesiq-mobilisten-flutter
SalesIQ Mobilisten plugin for Flutter.
https://github.com/zoho/salesiq-mobilisten-flutter
chat chat-sdk customer-support flutter framework mobilisten plugin salesiq support support-sdk zobot
Last synced: 4 months ago
JSON representation
SalesIQ Mobilisten plugin for Flutter.
- Host: GitHub
- URL: https://github.com/zoho/salesiq-mobilisten-flutter
- Owner: zoho
- License: mit
- Created: 2021-09-29T06:34:16.000Z (over 3 years ago)
- Default Branch: main
- Last Pushed: 2024-10-28T09:51:16.000Z (6 months ago)
- Last Synced: 2024-11-18T04:41:02.270Z (5 months ago)
- Topics: chat, chat-sdk, customer-support, flutter, framework, mobilisten, plugin, salesiq, support, support-sdk, zobot
- Language: Dart
- Homepage: https://mobilisten.io
- Size: 250 KB
- Stars: 12
- Watchers: 7
- Forks: 10
- Open Issues: 3
-
Metadata Files:
- Readme: README.md
- Changelog: CHANGELOG.md
- License: LICENSE
Awesome Lists containing this project
README
[](https://flutter.dev/) [](https://mobilisten.io/)
# Zoho SalesIQ Mobilisten Flutter Plugin
Connect with customers at every step of their journey. Give them the best in-app live chat experience with Mobilisten. Mobilisten enables customers to reach you from any screen on your app, get their questions answered, and make better purchase decisions.
>__**Note**__
>Zoho SalesIQ is GDPR Compliant! The configurations for the website and Mobile SDK remain the same; if you have already configured on your site, it will be automatically reflected in Mobile SDK. If not, then [learn how to configure](https://www.zoho.com/salesiq/help/portal-settings-enable-gdpr.html) now.
## Installation:
Please follow the steps mentioned below to install the Mobilisten plugin in your Flutter mobile application.
### Requirements
**Android**:
Ensure that your project meets the following requirements:
- Minimum Android Version: Android 5.0 (Lollipop) (API Level 21)
- Compile SDK Version: 34 (Android 14)
- Required Permissions:
- android.permission.INTERNET (Required for network operations)
**iOS**: iOS 12 or above is required. The minimum version of Xcode required is Xcode 13.
### Installation steps:
1. Add Mobilisten as a dependency within the `pubspec.yaml` file as shown below.
```diff
dependencies:
flutter:
sdk: flutter
+ salesiq_mobilisten: ^6.3.1
```
2. Run `flutter pub get` to fetch dependencies for the project.
3. Navigate to the `ios` directory and run the `pod install` command.
4. Add the following permissions in the **Info.plist** file for the iOS Runner project.

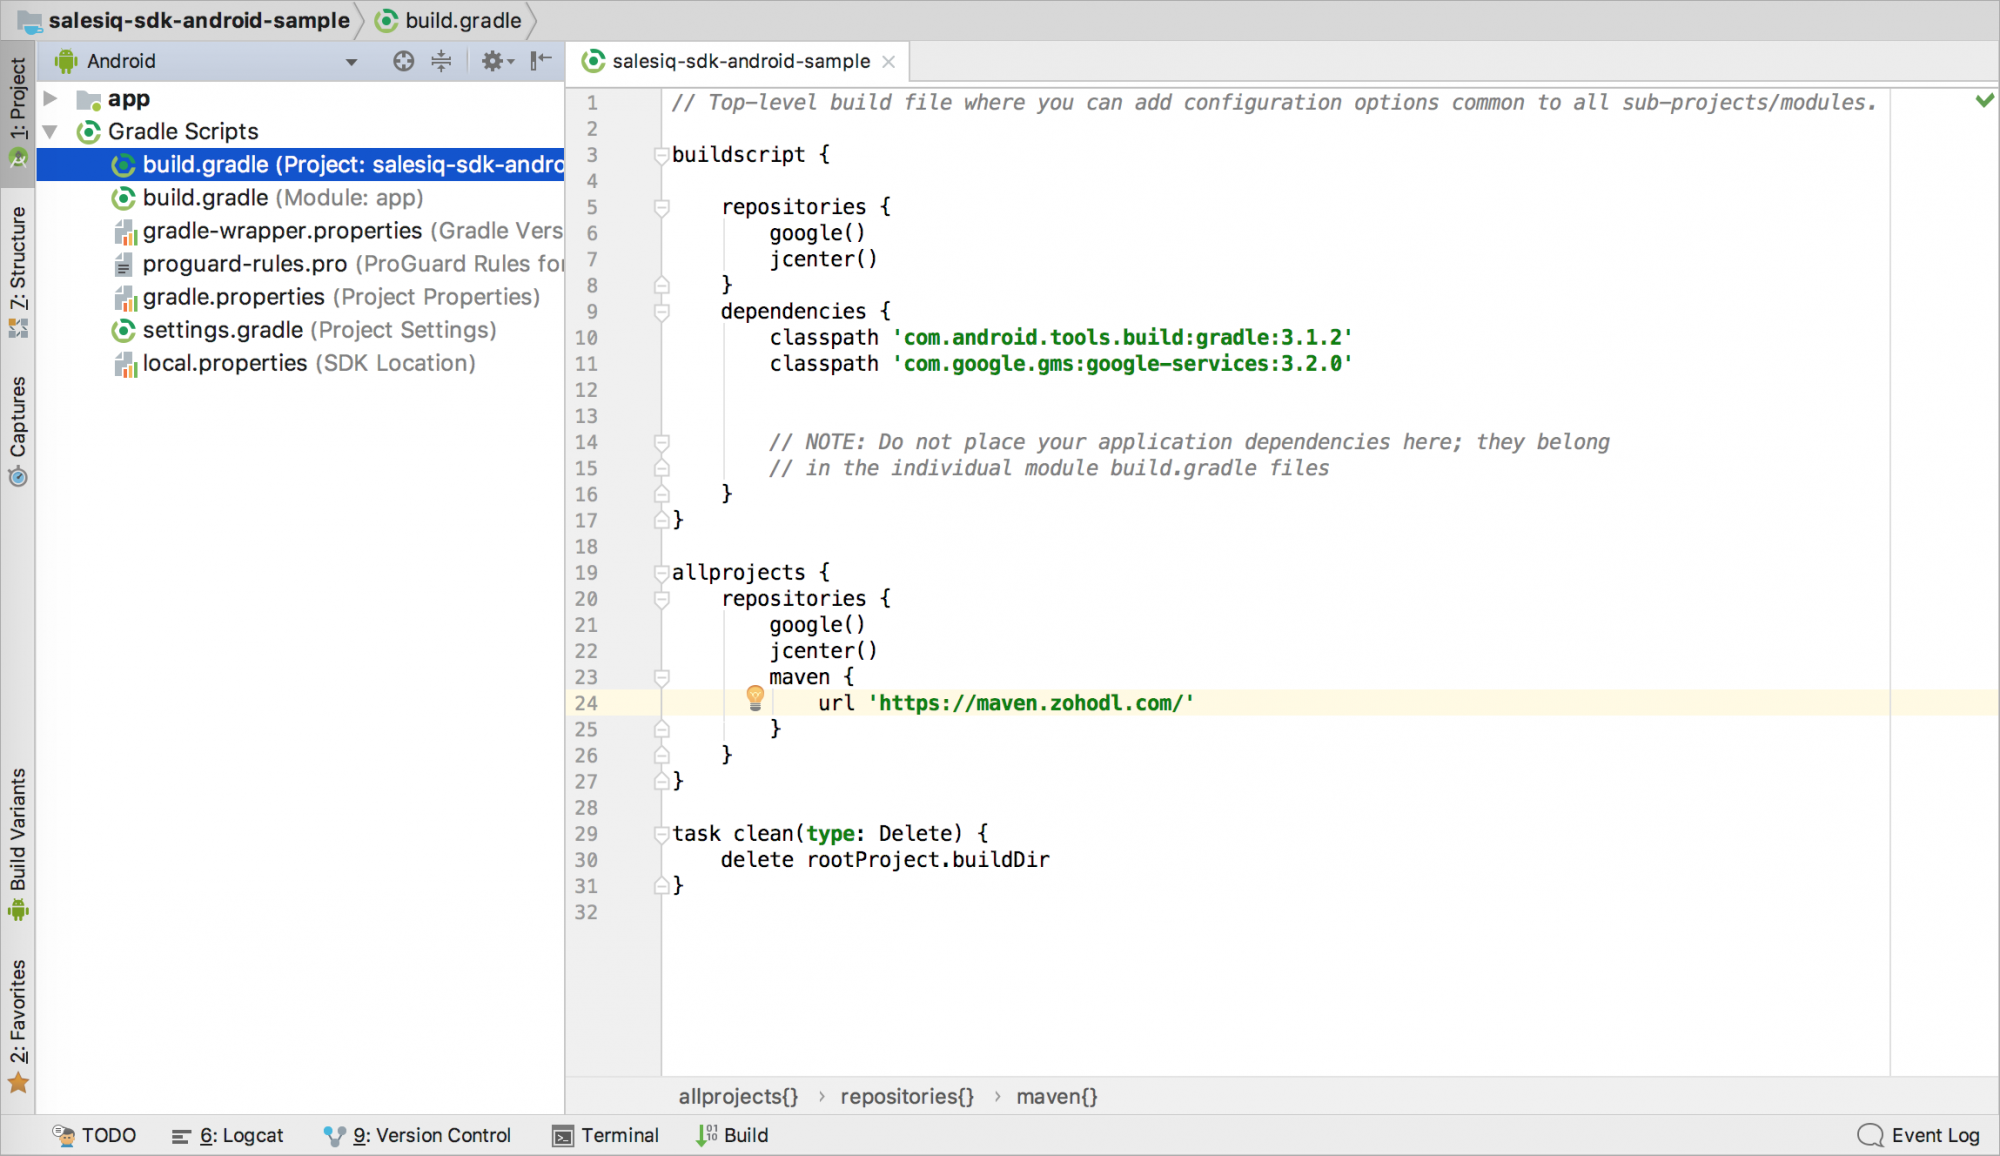
5. Open the `android` directory in Android Studio or any IDE used for Android development. Open the project `build.gradle` or `settings.gradle` file and add the following maven repository.
For Gradle version 6.7 and below
```Gradle
// Add the following to your project's root build.gradle file.
allprojects {
repositories {
google()
mavenCentral()
// ...
maven { url 'https://maven.zohodl.com' }
}
}
```
For Gradle version 6.8 and above
```Gradle
// Add the following to your settings.gradle file.
dependencyResolutionManagement {
repositoriesMode.set(RepositoriesMode.FAIL_ON_PROJECT_REPOS)
repositories {
google()
mavenCentral()
// Add the Zoho Maven URL here
maven { url 'https://maven.zohodl.com' }
}
}
```
Now, click on **Sync Now** or use the **Sync Project with Gradle Files** option under the File menu.
6. #### Proguard rules:
If you have enabled ProGuard(minifyEnabled) R8, then please add the following rules in your `proguard-rules.pro` file in your `project/android` folder.
```
-dontwarn kotlinx.parcelize.Parcelize
```
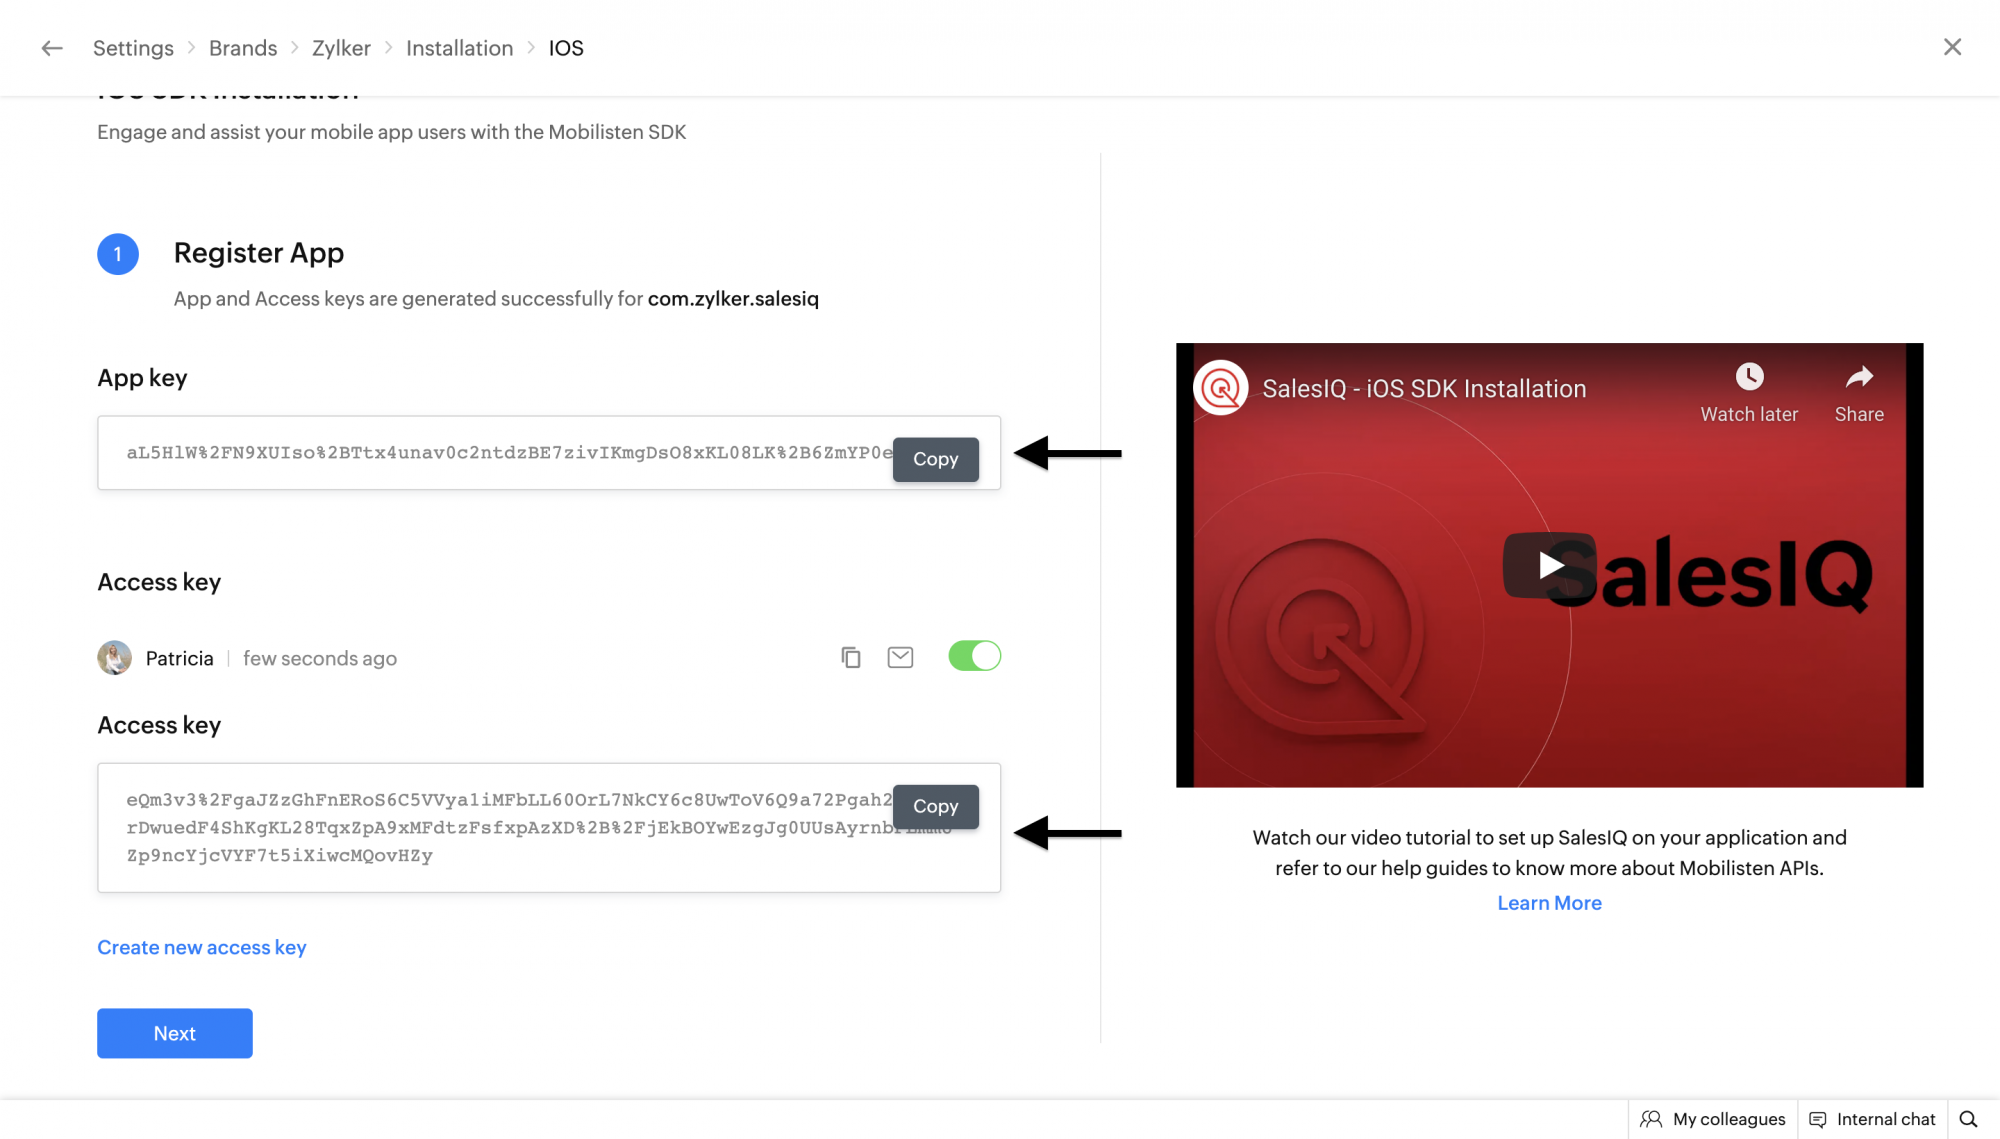
7. Generate the App and Access keys for iOS to initialize Mobilisten. In the Zoho SalesIQ console, navigate to `Settings` → `Brands` → `Installation` → `iOS`. Enter the bundle ID for the application as shown in the below example and Click on **Generate**.
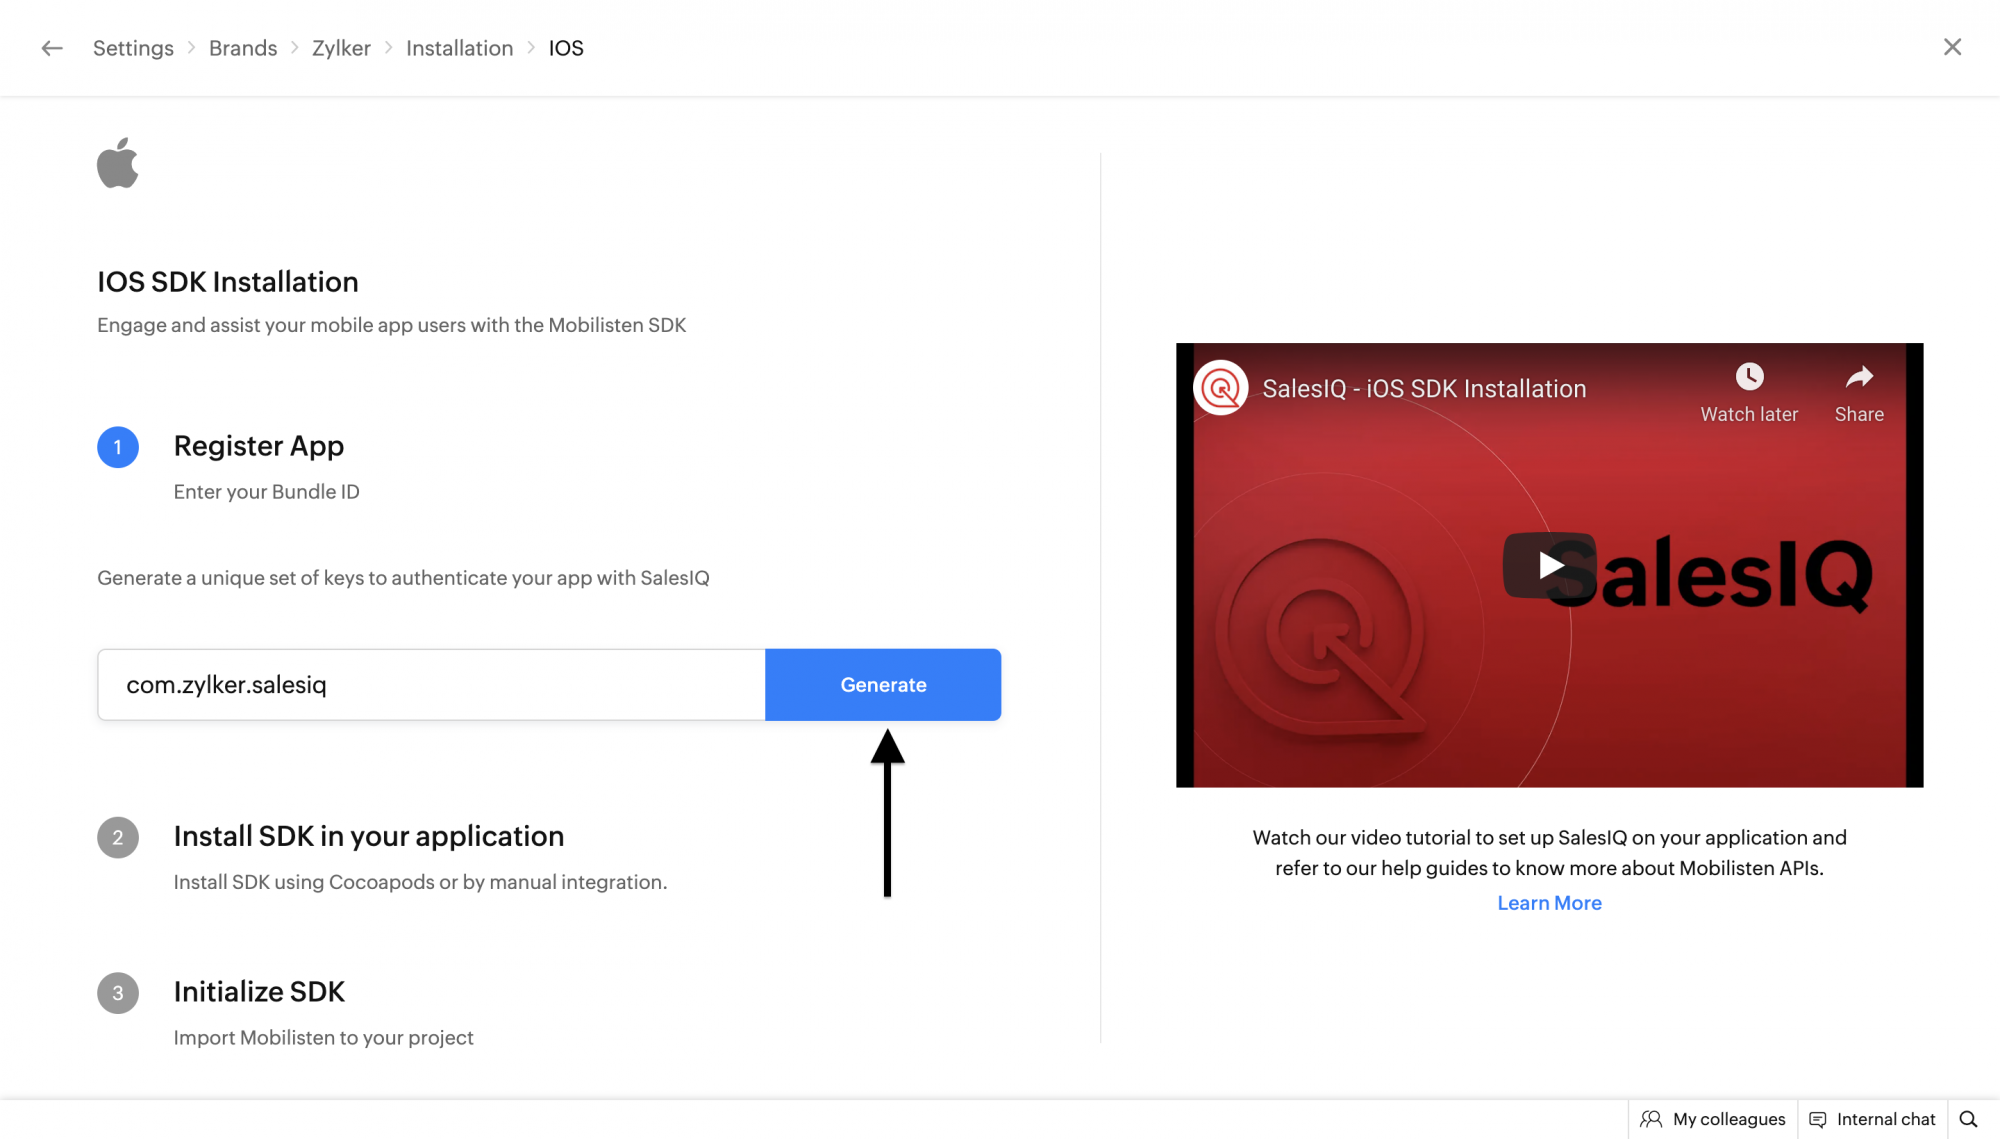
Note the App and Access keys generated for iOS to be used in further steps.
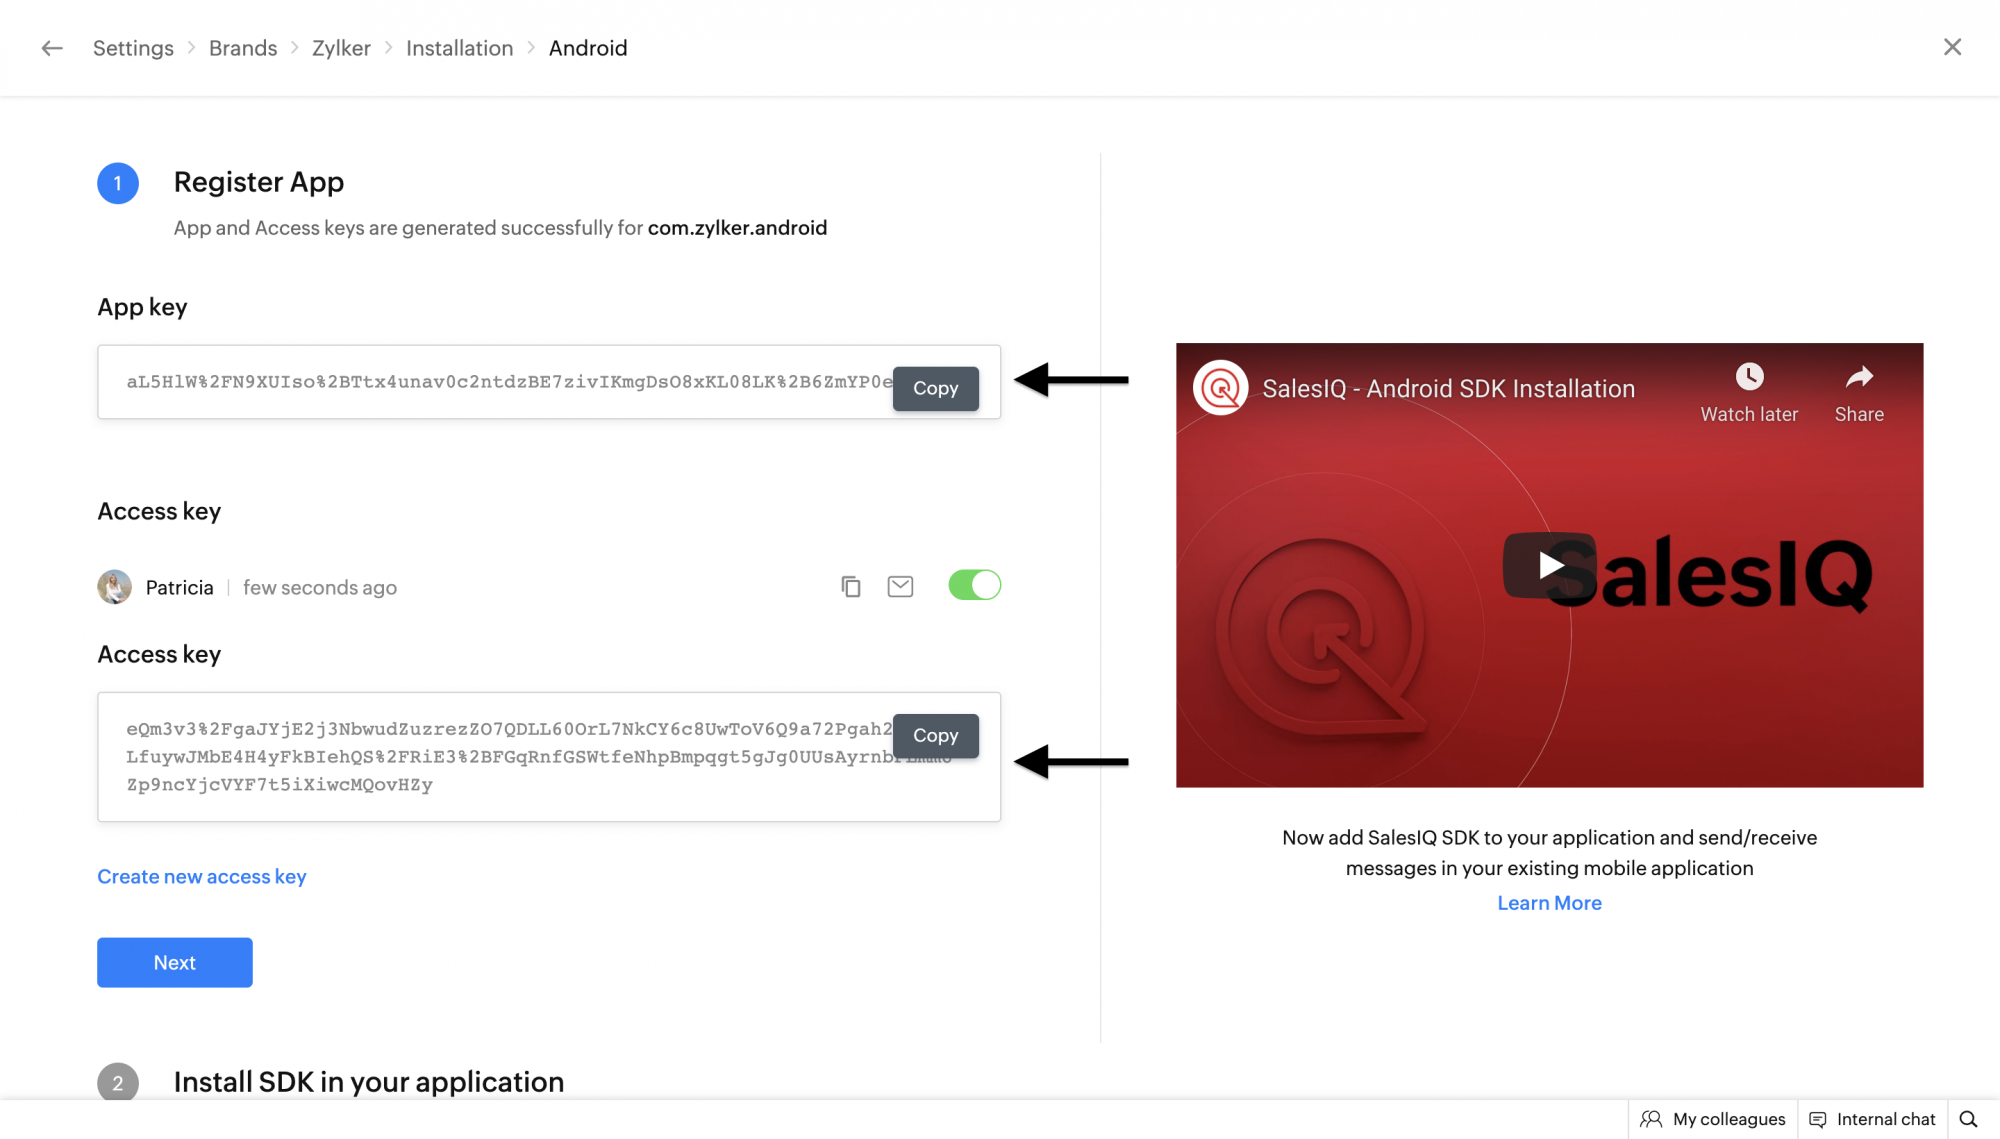
8. Generate the App and Access keys for Android to initialize Mobilisten. In the Zoho SalesIQ console, navigate to `Settings` → `Brands` → `Installation` → `Android`. Enter the bundle ID for the application as shown in the below example and Click on **Generate**.

Note the App and Access keys generated for Android to be used in further steps.
9. Open the **main.dart** file inside the `lib` directory and import Mobilisten as shown below. With this, additionally import `dart:io` to check the current platform which will be used at a later stage.
```dart
import 'dart:io' as io;
import 'package:salesiq_mobilisten/salesiq_mobilisten.dart';
```
10. Initialize Mobilisten using the [`init`](https://www.zoho.com/salesiq/help/developer-guides/flutter-sdk-init.html) API within the `initState()` method in the **main.dart** file.
```dart
if (io.Platform.isIOS || io.Platform.isAndroid) {
String appKey;
String accessKey;
if (io.Platform.isIOS) {
appKey = "INSERT_IOS_APP_KEY";
accessKey = "INSERT_IOS_ACCESS_KEY";
} else {
appKey = "INSERT_ANDROID_APP_KEY";
accessKey = "INSERT_ANDROID_ACCESS_KEY";
}
ZohoSalesIQ.init(appKey, accessKey).then((_) {
// initialization successful
ZohoSalesIQ.showLauncher(true); // Invoking showLauncher is optional.
}).catchError((error) {
// initialization failed
print(error);
});
}
```
11. Build and run the flutter application on Android and iOS.
## API Documentation
You can find the list of all APIs and their documentation [here](https://www.zoho.com/salesiq/help/developer-guides/flutter-sdk-show-launcher.html) under the **API Reference** section.