https://github.com/zyayoung/arduino-workshop
Arduino Basics
https://github.com/zyayoung/arduino-workshop
Last synced: 3 months ago
JSON representation
Arduino Basics
- Host: GitHub
- URL: https://github.com/zyayoung/arduino-workshop
- Owner: zyayoung
- License: mit
- Created: 2019-03-06T14:28:22.000Z (over 6 years ago)
- Default Branch: master
- Last Pushed: 2019-03-13T14:28:50.000Z (about 6 years ago)
- Last Synced: 2025-03-09T10:53:04.368Z (3 months ago)
- Size: 22.5 KB
- Stars: 3
- Watchers: 1
- Forks: 0
- Open Issues: 1
-
Metadata Files:
- Readme: README.md
- License: LICENSE
Awesome Lists containing this project
README
# Arduino-Workshop
## Outline
- [Foundations](#foundations)
- [Arduino](#arduino)
- [Arduino IDE](#arduino-ide)
- [Serial](#serial)
- [Power supply](#power-supply)
- [Components](#components)
- [LED & Breadboard & resistance](#led--resistance-led)
- Servo
- DC Motor (L298N)
- [Remote Control](#remote-control)
- PS2
- model remote control
- bluetooth
- [EEPROM](#eeprom)
## Foundations

### Recommended
#### Resources
- [Tutorial](https://www.arduino.cc/en/Tutorial/HomePage) - Official Tutorial
- [Tutorial](https://www.w3cschool.cn/arduino/) - Tutorial in Chinese
- [Projects](https://create.arduino.cc/projecthub) - Project hub
- [Adafruit](https://learn.adafruit.com/) - Model community
#### Tools
- [Fritzing](http://www.fritzing.org/) - Circuit diagram drawing
### Arduino
#### What is Arduino?
#### How to purchase an Arduino board?
| | Uno | Nano | Mega |
| ------------ | ---------------------------------------------------------- | ------------------------------------------------------------ | ------------------------------------------------------------ |
| Power supply | enough | weak | ?? |
| Size | moderate | small | large |
| Price | moderate | low | expensive |
| Image | 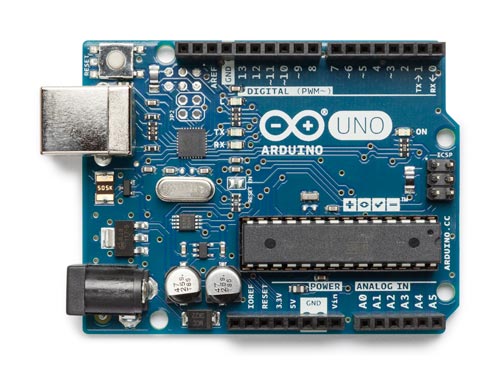 | 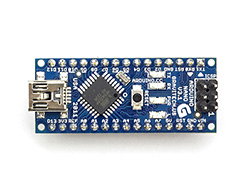 | 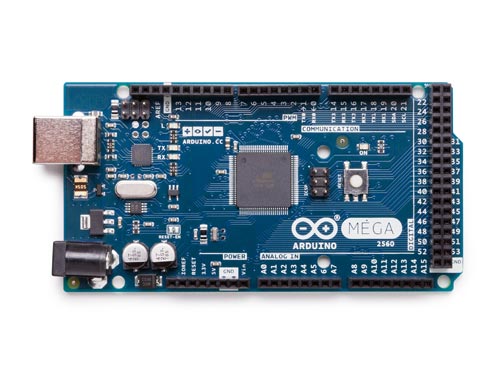 |
From: [https://www.arduino.cc/en/Main/Products](https://www.arduino.cc/en/Main/Products)
**\*Tip: If not necessary, please NEVER take Nano into consideration!**
#### Input/Output & Digital/Analog

1. **Digital pins** Use these pins with digitalRead(), digitalWrite(), and analogWrite(). analogWrite() works only on the pins with the PWM symbol.
2. **Pin 13** LED The only actuator built-in to your board. Besides being a handy target for your first blink sketch, this LED is very useful for debugging.
3. **Power LED** Indicates that your Genuino is receiving power. Useful for debugging.
4. **ATmega microcontroller** The heart of your board.
5. **Analog in** Use these pins with analogRead().
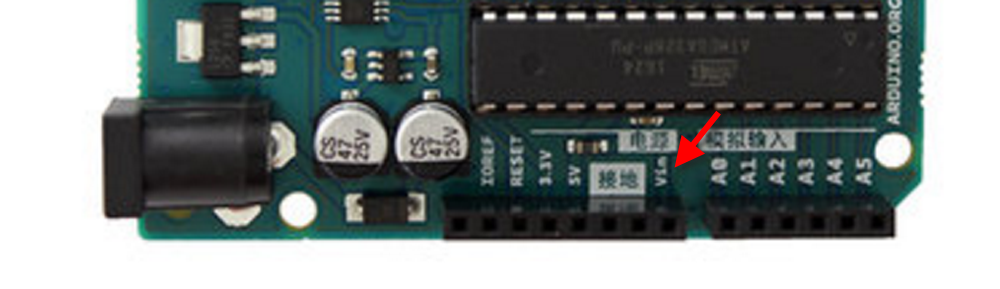
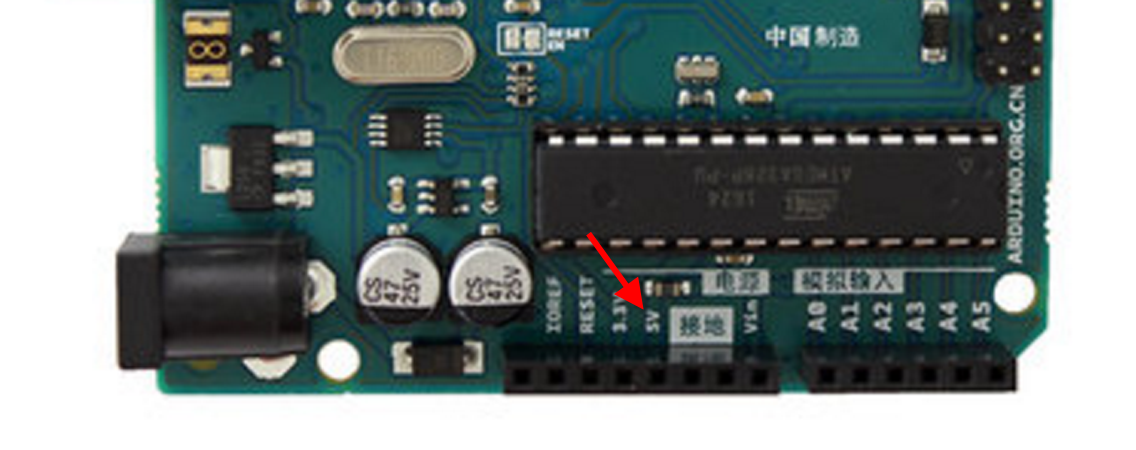
6. **GND and 5V pins** Use these pins to provide +5V power and ground to your circuits.
7. **Power connector** This is how you power your Genuino when it’s not plugged into a USB port for power.
8. **TX and RX LEDs** These LEDs indicate communication between your Genuino and your computer. Expect them to flicker rapidly during sketch upload as well as during serial communication. Useful for debugging.
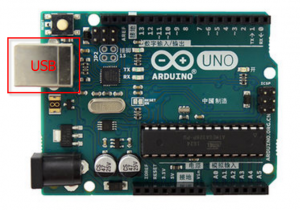
9. **USB port** Used for powering your Genuino Uno, uploading your sketches to your Genuino, and for communicating with your Genuino sketch (via Serial. println() etc.).
10. **Reset button** Resets the ATmega microcontroller.
From [https://www.arduino.cc/en/Guide/BoardAnatomy](https://www.arduino.cc/en/Guide/BoardAnatomy)
##### [Digital](https://www.arduino.cc/en/Tutorial/DigitalPins)
[Digital Input Example](https://www.arduino.cc/en/Tutorial/DigitalReadSerial)
```Arduino
// set pin to input
pinMode(pin, INPUT);
// read the input pin:
int buttonState = digitalRead(pin);
// print out the state of the button:
Serial.println(buttonState);
```
[Digital Output Example](https://www.arduino.cc/en/Tutorial/Blink)
```Arduino
pinMode(A0, OUTPUT);
digitalWrite(A0, HIGH);
```
##### [Analog](https://www.arduino.cc/en/Tutorial/AnalogInputPins)
[Input Example](https://www.arduino.cc/en/Tutorial/ReadAnalogVoltage)
```Arduino
// set pin to input
pinMode(A0, INPUT);
// read the input on analog pin 0:
int sensorValue = analogRead(A0);
// Convert the analog reading (which goes from 0 - 1023) to a voltage (0 - 5V):
float voltage = sensorValue * (5.0 / 1023.0);
// print out the value you read:
Serial.println(voltage);
```
### Arduino IDE
#### How to configure an Arduino development environment
[Downlaod](https://www.arduino.cc/en/Main/Software)
\*Windows users please use Installer to ensure the driver can be installed correctly
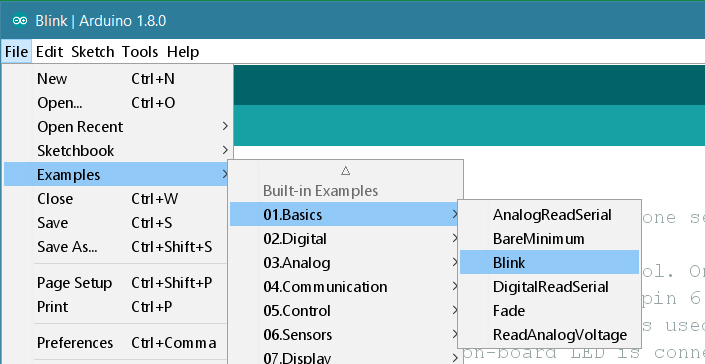
#### Introduction of usage
1. open the sample program
2. choose board type and port

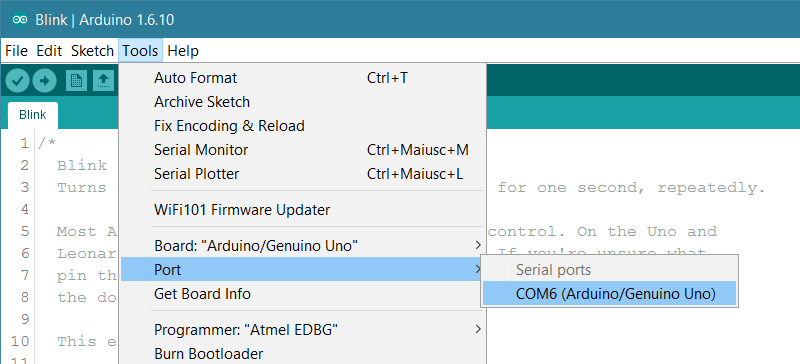
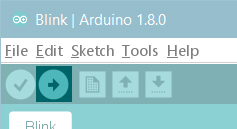
3. compile and upload your program
4. Serial Monitor

From:
[https://www.arduino.cc/en/Guide/ArduinoUno](https://www.arduino.cc/en/Guide/ArduinoUno)
[https://learn.adafruit.com/adafruit-arduino-lesson-5-the-serial-monitor/the-serial-monitor](https://learn.adafruit.com/adafruit-arduino-lesson-5-the-serial-monitor/the-serial-monitor)
### Serial
1. Open the sample program
2. File > Examples > 01.Basics > DigtalReadSerial
3. Uplaod the code to the board
4. Open Serial Monitor on the top right corner in the Arduino IDE

5. Read the serial output in the new window
### Power
There are multiple ways that can input power for the board.
Some ports on the board also can output power for the components.
| Input port | USB-B | VIN | 5V | DC input |
| ---------- | ----- | -------- | ----- | -------- |
| Voltage | 5V DC | 7-12V DC | 5V DC | 9-12V DC |
| Input | Yes | Yes | Yes | Yes |
| Output | No | Yes | Yes | No |
1. From USB-B port
2. From VIN port
3. From 5V port
4. From DC input port
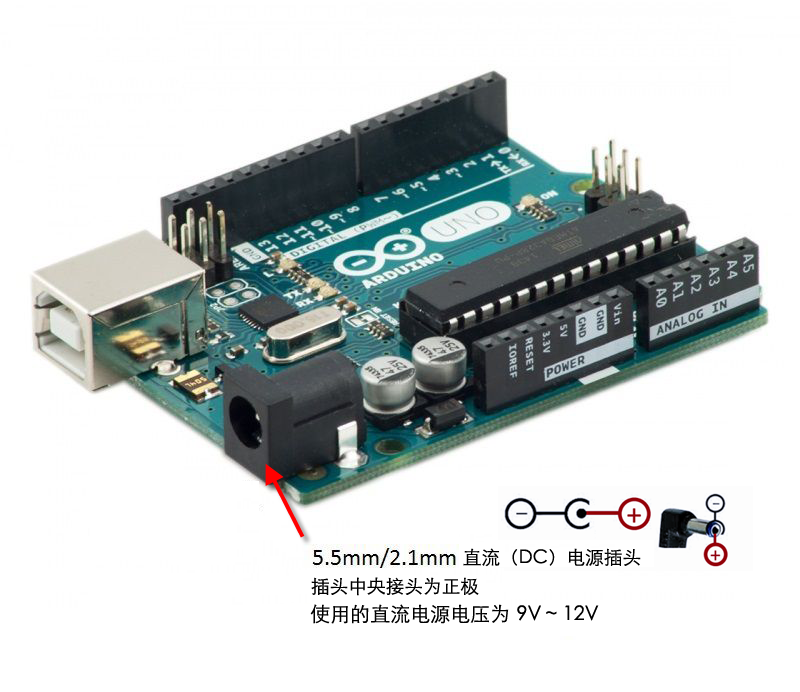
From [http://www.taichi-maker.com/homepage/arduino-projects-index/arduino-power-supply/](http://www.taichi-maker.com/homepage/arduino-projects-index/arduino-power-supply/)
You can use following power supply for the board:
1. 11.1V 3S model battery (HIGHLY recommended, powerful, but careful about destroy the circuit)
2. 5V portable power supply (recommended, notice whether it supports micro current power supply)
3. 9V dry cell (NOT recommended, high internal resistance)
For these ports which can output strong power, something needs to be mentioned:
1. These pins are not very stable at supply power. It can output at most 40mA current.
2. They may conflict with other digital pins or analog pins.
## Components
### LED & Resistance
Arudino has a built-in LED on `LED_BUILTIN` port Arduino 内置 LED 于`LED_BUILTIN`引脚。
Connect the long pin of the outside LED with 13 port 将外部 LED 较长的引脚(正极)接在 13 口
Connect the short pin of the outside LED with GND port 较短引脚接在 GND(负极)
Circuit:
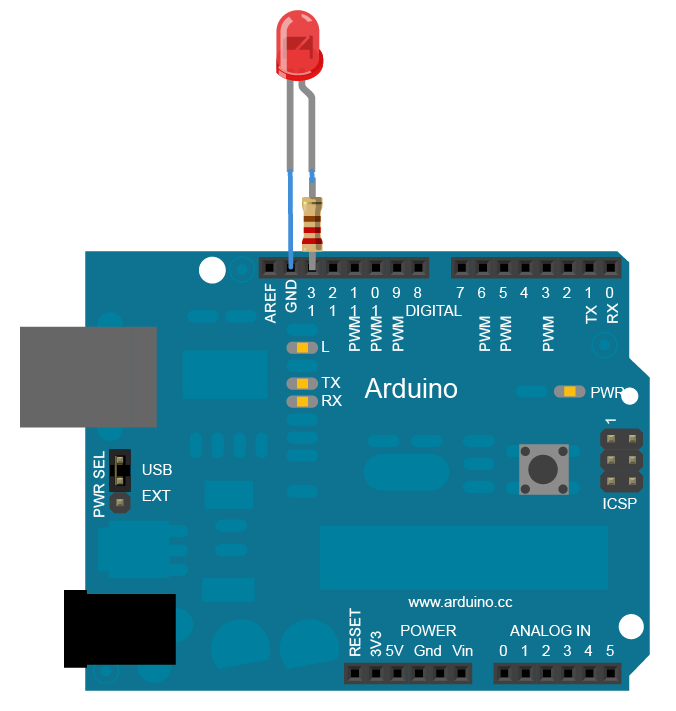
[Code](https://www.arduino.cc/en/Tutorial/Blink)
### Breadboard
Breadboard principle:

Example Usage:
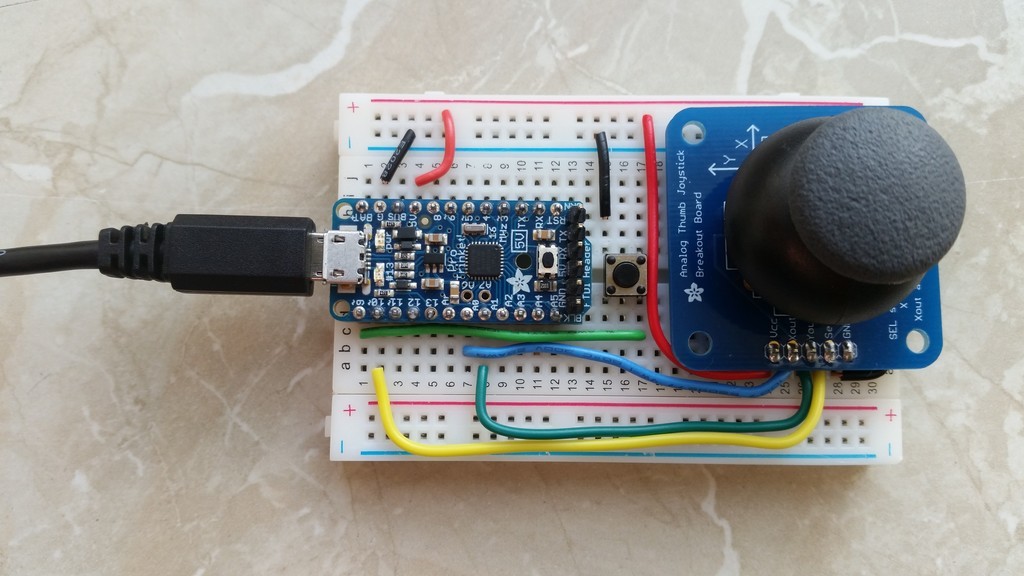
From: [https://learn.adafruit.com/breadboards-for-beginners](https://learn.adafruit.com/breadboards-for-beginners)
### Servo

```Arduino
#include
Servo myservo;
void setup() {
myservo.attach(9);
}
void loop() {
myservo.write(90); // 0 - 180
}
```
[Code](https://www.arduino.cc/en/Tutorial/Sweep)
[Servo library](https://www.arduino.cc/en/Reference/Servo)
---
### DC Motor
#### PWM

> A call to analogWrite() is on a scale of 0 - 255, such that analogWrite(255) requests a 100% duty cycle (always on), and analogWrite(127) is a 50% duty cycle (on half the time) for example.
>
> From [https://www.arduino.cc/en/Tutorial/PWM](https://www.arduino.cc/en/Tutorial/PWM)
## Remote Control
### PS2
### Bluetooth
## EEPROM