https://github.com/smrtos/Zephyr2VSC
A tool to import Zephyr code into Visual Studio Code in the context of a Zephyr application
https://github.com/smrtos/Zephyr2VSC
Last synced: about 19 hours ago
JSON representation
A tool to import Zephyr code into Visual Studio Code in the context of a Zephyr application
- Host: GitHub
- URL: https://github.com/smrtos/Zephyr2VSC
- Owner: smrtos
- License: mit
- Created: 2021-09-14T09:41:38.000Z (over 3 years ago)
- Default Branch: master
- Last Pushed: 2023-01-31T02:41:27.000Z (over 2 years ago)
- Last Synced: 2024-08-04T01:14:05.877Z (9 months ago)
- Language: Python
- Size: 835 KB
- Stars: 16
- Watchers: 2
- Forks: 4
- Open Issues: 1
-
Metadata Files:
- Readme: ReadMe.md
- License: LICENSE
Awesome Lists containing this project
- awesome-zephyr-rtos - VS Code importer
README
## Introduction
Visual Studio Code is a cross-platform IDE.
This tool imports Zephyr ([https://github.com/zephyrproject-rtos/zephyr](https://github.com/zephyrproject-rtos/zephyr) ) source code into Visual Studio Code in the context of a build.
A build must be made before using this tool because certain dependent files are only generated after a build.
This tool can run on both Windows and Linux.
## What you will get via this tool
- Exclusion of C files irrelevant to a specific Zephyr build
- Intellisense support
- Unambiguous symbol resolution
- Goto definition/declaration easily
- Rich VS Code extensions
- etc.
## Notes
This tool will exclude files which are NOT relevant to the selected build context.
But the file exclusion is only done for .c files. Not for other files.
So if you open arbitrary files such as a .h file, that file may NOT be relevant to the current build.
So the symbols in that file may NOT be fully resolved.
In future I may expand the scope of irrelevant file exclusion.
But for .c file browsing, it suffices, I think.
## Pre-requisites
1. Install VS Code
Windows: [https://code.visualstudio.com/docs/?dv=win](https://code.visualstudio.com/docs/?dv=win)
Linux: [https://code.visualstudio.com/docs/?dv=linux64_deb](https://code.visualstudio.com/docs/?dv=linux64_deb) (Ubuntu like)
2. Install VSCode C/C++ Extension:
[https://code.visualstudio.com/docs/languages/cpp](https://code.visualstudio.com/docs/languages/cpp)
3. Install Python 3:
[https://www.python.org/downloads/release/python-373/](https://www.python.org/downloads/release/python-373/)
## Usage
1. Download and extract the zip.
2. Goto the extracted folder.
3. Run `python -m zephyr2vsc` to see the usage info and run it.

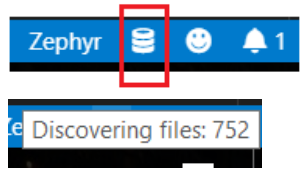
4. Open the zephyr source dir with VS Code. And wait for the database icon at the bottom right to disappear.
It takes less than 1 min on Windows. Linux is even faster.
This icon indicates that VS Code is parsing the files in the background.
You can hover the mouse on it to see the progress.

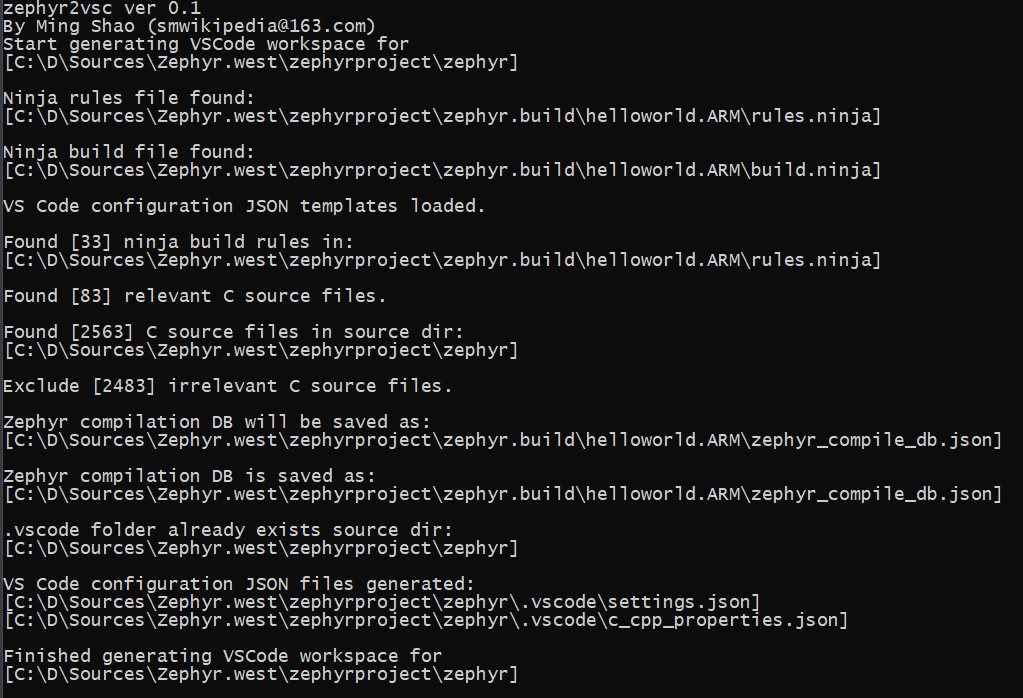
## A sample run

## Known issues
1. Below VS Code C/C++ extension bug is not fixed. Currently using a workaround.
[https://github.com/microsoft/vscode-cpptools/issues/4063](https://github.com/microsoft/vscode-cpptools/issues/4063)
2. Below VS Code C/C++ extension bug used to be an issue but has been fixed. Please use VS Code c_cpp_extension >= 0.25.1.
3. Do not change the driver letters with `subst` command on Windows after a Zephyr build is made.
Because the .ninja files uses absolute path and the new driver letter will break the relative path handling.
## Development
* Create a virtual environment:
* Windows: `python -m venv venv`
* Linux: `python3 -m venv venv`
* Activate the virtual environment:
* Windows: `. venv/scripts/activate`
* Linux: `. venv/bin/activate`
* Install the development dependencies to the virtual environment:
* `pip install zephyr2vsc[dev]`
## Testing
* All PRs must pass:
* `black --check .`
* `isort --check-only .`
* `flake8 .`
* `mypy .`
* VSCode: Terminal -> Run Task... -> All Tests
* Complete tests rely on a Zephyr environment being available. This will be run in a Github Workflow on PR. If you'd like to get it running on your local environment:
* Clone Zephyr into tests/fixtures/zephyrproject
* `git submodule init`
* `git submodule update`
* Install the dependencies for Zephyr (if you haven't already): https://docs.zephyrproject.org/latest/develop/getting_started/index.html#install-dependencies
* Below is modification of: https://docs.zephyrproject.org/latest/develop/getting_started/index.html#get-zephyr-and-install-python-dependencies
* Use the exisisting venv: `. venv/bin/activate` (linux) or `. venv/scripts/activate` (windows)
* `pip install west`
* `cd tests/fixtures`
* `west init zephyrproject`
* `cd zephyrproject`
* `west update`
* `west zephyr-export`
* `pip install -r zephyr/scripts/requirements.txt`
* Install Zephyr SDK 0.15.2 at `$HOME` (if you haven't already): https://docs.zephyrproject.org/latest/develop/getting_started/index.html#install-zephyr-sdk
* TODO: we can add an environment variable for the Zephyr SDK location and version in the future; please PR if you need this
* Now you can run tests: `pytest`
* The unit tests will:
* compile a sample zephyr project
* run `zephyr2vsc` on it
* (so they take a while)